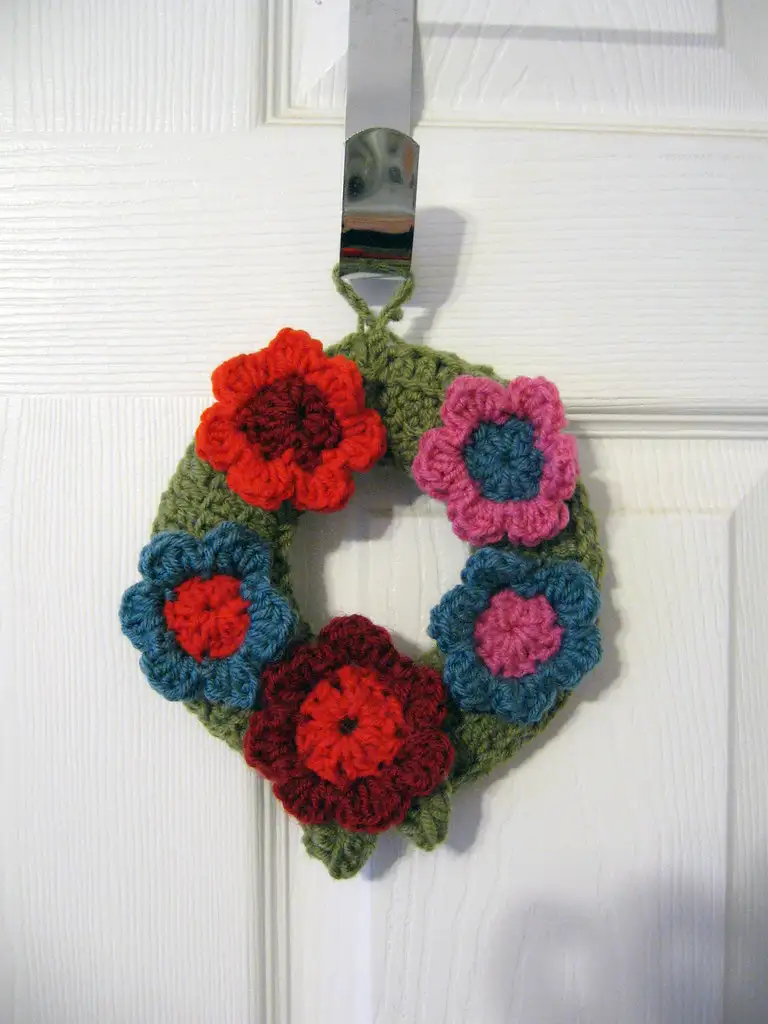
This crochet Christmas wreath is made by covering a simple foam ring with a crocheted strip, then decorating it with holly leaves, round red berries and a chunky bow. It is written in UK crochet terms, uses only basic stitches and works up over a few relaxed evenings.
Quick answer: To make a crochet Christmas wreath, cover a foam ring with a long crocheted strip, then decorate it with crochet holly leaves, red berries and a bow. You need about one 100g ball of green DK yarn, small amounts of red and dark green, and a 4mm hook. It uses only basic UK stitches and takes a few evenings.
A crochet wreath lasts for years, never drops needles and is light enough to hang on almost any door, wall or cupboard. Below you will find the materials list, the full pattern for every part, sizing for smaller and larger rings, and tips for a neat, professional finish.
Why make a crochet Christmas wreath?
- It is reusable. Unlike a fresh wreath, it will not dry out, so you can bring it out every December.
- It is beginner friendly. The whole project uses chains, slip stitches, double crochet, half trebles and trebles.
- It is personal. You choose the colours, the size and how many leaves and berries to add.
- It makes a lovely gift. A finished crochet Christmas wreath is a thoughtful present for neighbours, teachers or anyone who loves handmade decorations.
It is also a good stash buster. The cover takes one main colour, but the leaves, berries and bow only need small amounts, so leftover yarn from other projects is perfect.
What you will make
The finished crochet Christmas wreath in this pattern measures about 20cm across. It has four parts, each made separately and then sewn together:
- A green cover strip worked in half treble crochet and sewn around a 20cm foam ring.
- Nine holly leaves with pointed edges.
- Nine stuffed red berries.
- A bow with two tails, plus a strong crocheted hanging loop.
If you would prefer a slimmer look, there is also a metal ring option further down, where you crochet straight over the ring with no sewing.
Materials and tools
| Item | What to use | Notes |
|---|---|---|
| Ring | 20cm polystyrene (foam) wreath ring, about 3cm thick | Craft shops often call these foam or styrofoam rings |
| Main colour | Green DK yarn, one 100g ball | Acrylic or an acrylic blend holds its colour and is easy to wipe |
| Contrast colours | Red DK for berries and bow, plus a darker green for leaves if you like | Small amounts only |
| Hook | 4mm (UK 8, US G-6) | Use 3.5mm for firmer berries |
| Extras | Tapestry needle, scissors, dressmaking pins, a little toy stuffing, stitch marker | Fabric glue is optional |
If you are not sure what DK means, the Craft Yarn Council yarn weight system explains the standard categories. DK sits in category 3, light. For help choosing a hook, see our guide to crochet hooks.
Abbreviations (UK terms with US equivalents)
| UK term | Meaning | US term |
|---|---|---|
| ch | chain | ch |
| ss | slip stitch | sl st |
| dc | double crochet | sc (single crochet) |
| htr | half treble crochet | hdc (half double crochet) |
| tr | treble crochet | dc (double crochet) |
| dc2tog | double crochet 2 stitches together | sc2tog |
| st(s) | stitch(es) | st(s) |
New to UK patterns? Our UK vs US crochet terms guide has a full conversion chart, and our half treble crochet tutorial walks you through the main stitch used for the cover.
Tension and fit
Exact tension is not critical for a crochet Christmas wreath, because you measure the strip against your own ring as you go. What matters is that the cover fits snugly. A strip that is slightly narrower than the ring will stretch around it neatly, while a strip that is too wide will wrinkle and sag.
Before you start, take two measurements with a soft tape measure:
- Width: wrap the tape around the thickness of the ring, like a bracelet around a wrist. On a ring about 3cm thick this is roughly 9 to 10cm.
- Length: measure around the middle of the ring, halfway between the inner and outer edges. On a 20cm ring this is roughly 53cm.
Step 1: crochet the cover strip for your crochet Christmas wreath
Using green yarn and a 4mm hook, ch 18.
Row 1: htr in 3rd ch from hook and in each ch to end. (16 htr)
Row 2: ch 2 (does not count as a stitch), turn, htr in each st to end. (16 htr)
After a few rows, check the width. Hold the strip around the thickness of the ring. The long edges should only just meet when the strip is gently stretched. If there is a gap of more than about 1cm, or the edges overlap, pull the work back and start again with a couple more or fewer chains. Any stitch count works, so adjust freely.
Repeat Row 2 until the strip, gently stretched, reaches all the way around the middle of the ring. Fasten off, leaving a tail of about 60cm for sewing.
Step 2: cover the ring
- Lay the strip on the front of the ring, wrong side against the foam.
- Wrap the long edges around the ring so they meet at the back, close to the inner edge. Pin them together every few centimetres.
- Thread the long tail onto a tapestry needle and whip stitch the two long edges together, going through one stitch from each edge each time.
- The outer curve of the ring is longer than the inner curve, so ease the strip as you go. Stretch it a little more over the outside edge and keep the seam towards the inside back, where it will not show.
- When you reach the start, sew the two short ends of the strip together and weave in all ends.
Your covered ring is now the base of your crochet Christmas wreath. Give it a gentle squeeze all the way round to settle the stitches evenly.

Metal ring option: crochet straight over the ring
For a slimmer, more modern crochet wreath, use a 20cm metal ring or the inner ring of a wooden embroidery hoop instead of foam.
- Make a slip knot on your hook. Insert the hook through the centre of the ring, yarn round hook and pull a loop back to the front, then yarn round hook and pull through both loops. This joins the yarn with a dc worked around the ring.
- Work dc around the ring in the same way, pushing the stitches together as you go so no metal shows through.
- When the whole ring is covered, ss into the first dc and fasten off. Weave in the ends.
This version of the crochet Christmas wreath uses far less yarn. Because the base is thin, add fewer, smaller decorations, such as three leaves and three berries grouped at the bottom.
Step 3: holly leaves (make 9)
Use green DK, a darker shade than the cover if you have one, and a 4mm hook. Each leaf is worked along both sides of a foundation chain.
Ch 11.
Side 1: working into the chain, ss in 2nd ch from hook, dc in next ch, htr in next ch, tr in next ch, ch 3, ss in 3rd ch from hook (picot made), tr in next 2 ch, picot, tr in next ch, htr in next ch, dc in next ch, 3 dc in last ch.
Side 2: now work along the other side of the foundation chain. Dc in next ch, htr in next ch, tr in next ch, picot, tr in next 2 ch, picot, tr in next ch, htr in next ch, dc in next ch, ss in next ch (the same ch as the first ss).
Fasten off, leaving a tail of about 20cm for sewing. Each leaf is about 5 to 6cm long with DK. For a vein, work a line of surface slip stitches down the centre in a lighter green.
Step 4: berries (make 9)
Use red DK and a 4mm hook, or a 3.5mm hook for firmer berries. Work in a spiral without joining, and use a stitch marker in the first stitch of each round. If you have not made one before, see how to do a crochet magic ring.
Round 1: make a magic ring, 6 dc into the ring, pull tight. (6 sts)
Round 2: 2 dc in each st. (12 sts)
Round 3: dc in each st. (12 sts)
Round 4: dc2tog 6 times. (6 sts)
Stuff the berry firmly with a little toy stuffing or yarn scraps. Fasten off, leaving a tail. Thread the tail through the front loops of the last 6 stitches, pull tight to close, then use the same tail to sew the berry on.

Step 5: the bow
Use red DK and a 4mm hook. The bow has three pieces: the loop, the centre band and two tails.
Bow loop: ch 37. Row 1: htr in 3rd ch from hook and in each ch to end. (35 htr) Rows 2 to 5: ch 2 (does not count as a stitch), turn, htr in each st to end. (35 htr) Fasten off, leaving a long tail. Sew the two short ends together to make a ring, then flatten it with the seam at the centre back.
Centre band: ch 7. Row 1: dc in 2nd ch from hook and in each ch to end. (6 dc) Rows 2 to 8: ch 1 (does not count as a stitch), turn, dc in each st to end. (6 dc) Fasten off, leaving a long tail. Wrap the band around the middle of the flattened loop, pinching it into a bow shape, and sew the ends together at the back.
Tails (make 2): ch 22. Row 1: htr in 3rd ch from hook and in each ch to end. (20 htr) Row 2: ch 2 (does not count as a stitch), turn, htr in each st to end. (20 htr) Fasten off. Sew both tails behind the bow in a V shape.
Step 6: the hanging loop
Decide which part of the wreath will be the top. On the back, join green yarn with a ss into the cover, close to the seam.
Ch 30, then ss into the same place to form a loop. Turn and work 1 dc in each ch of the loop (30 dc), then ss into the cover and fasten off. The row of double crochet makes the loop much stronger than a plain chain. Weave in the ends securely.
If you prefer, you can hang your crochet Christmas wreath from a length of ribbon tied around the top of the ring instead.
How to assemble your crochet Christmas wreath
- Lay the covered ring flat and arrange the pieces before you sew anything. Group the leaves in threes, with three berries tucked into the centre of each group.
- A balanced layout is three clusters spaced around the ring, with the bow at the top or the bottom. For an asymmetric look, place all the clusters on the lower third.
- Pin everything in place, hang the wreath up for a moment and check it from across the room.
- Sew each leaf on along its centre line, so the pointed edges can lift slightly. Sew the berries on with their own tails.
- Sew the bow on last, stitching through the centre band and the cover of the crochet Christmas wreath.
- Weave in every end on the back.
Size variations
Foam rings vary in thickness between makers, so always measure your own ring. Use this table as a starting point.
| Ring size | Typical thickness | Approx. strip length | Leaves | Berries |
|---|---|---|---|---|
| 15cm | 2.5cm | 40cm | 6 | 6 |
| 20cm | 3cm | 53cm | 9 | 9 |
| 25cm | 4cm | 66cm | 12 | 12 |
| 30cm | 4.5cm | 80cm | 15 | 15 |
- Thicker ring: add chains to the starting chain of the cover strip until the width fits.
- Smaller bow: for a 15cm ring, ch 27 for the loop (25 htr) and work 3 rows in total.
- Larger bow: for a 30cm ring, ch 47 for the loop (45 htr) and work 6 rows in total. Make the centre band a few rows longer to fit.
Mini crochet Christmas wreath ornament
For a tree ornament, work the metal ring method over a small metal ring of about 7 to 8cm. Add a few red French knots as berries and tie a small bow from a length of red yarn. It pairs well with our crochet Christmas tree ornaments.
Colour ideas for a crochet Christmas wreath
- Classic: mid green cover, dark green leaves, red berries and a red bow.
- Scandi: white or cream cover with red leaves and a red and white bow.
- Natural: oatmeal cover with sage leaves and cream berries.
- Frosty: pale blue or silver grey cover with white leaves and silver sparkle yarn berries.
- Scrappy: work the cover in stripes of leftover yarn, changing colour every two rows.
Tips for a neat crochet wreath
- Keep your tension even along the cover strip, as tight and loose rows show when the strip is stretched.
- Always keep the seam at the inner back edge, where it is hidden when the wreath hangs.
- Pin the leaves flat, spray them lightly with water and leave them to dry. This opens the points nicely.
- Stuff berries firmly so they stay round.
- Sew with the same colour yarn as the piece you are attaching, so the stitches disappear.
Common problems and fixes
| Problem | Likely cause | Fix |
|---|---|---|
| White foam shows through | Strip too narrow or loose stitches | Wrap the ring in green yarn first, or start the strip again with more chains |
| Cover wrinkles | Strip too wide or too long | Pull back a few rows, or restart with fewer chains |
| Leaves curl | Tight tension on the chain | Pin out and dampen, or use a hook one size larger for the chain |
| Wreath hangs crooked | Uneven weight or loop off centre | Move the loop or rebalance the decorations |
Caring for and storing your crochet Christmas wreath
Hang your crochet Christmas wreath indoors or in a sheltered porch, as rain will soak the yarn and spoil the foam. Dust it with a soft clean brush now and then.
After Christmas, wrap it loosely in tissue paper and store it flat in a box, with nothing heavy on top, so the bow keeps its shape for next year.
Giving a crochet Christmas wreath as a gift
A handmade wreath is a generous present, so plan ahead and allow time for the decorations as well as the cover. Add a gift tag with a note on how to store it. For more present ideas, see our guide to gifts for crocheters and our roundup of Christmas crochet ideas.
Looking for something quicker to make alongside it? Our easy crochet Christmas decorations and crochet advent calendar use the same basic stitches.
Making a wreath for November too? Our free crochet poppy pattern works up in about 30 minutes, and a ring of red poppies makes a lovely Remembrance wreath using the same covered-ring method.
Frequently asked questions about the crochet Christmas wreath
How long does a crochet Christmas wreath take to make?
Most of the time goes into the cover strip. The leaves, berries and bow are quick, so many people finish a crochet Christmas wreath over a weekend or a few evenings.
What size ring do I need for a crochet Christmas wreath?
A 20cm foam ring suits most front doors and interior doors. A 15cm ring is good for a window or cupboard, and 25 to 30cm makes a bold statement. Always measure the thickness of your ring before you start the cover.
Can a beginner make this crochet wreath?
Yes. It only uses chains, slip stitches, double crochet, half trebles and trebles in UK terms. The cover is a simple rectangle, and you can check the fit as you go.
What is the best yarn for a crochet Christmas wreath?
Smooth DK acrylic or an acrylic blend works well. It is light, holds its colour, is easy to dust and shows the stitches clearly.
Can I hang my crochet wreath outside?
Only in a sheltered spot such as a covered porch. Rain soaks the yarn and can damage the foam ring, so indoors is best.