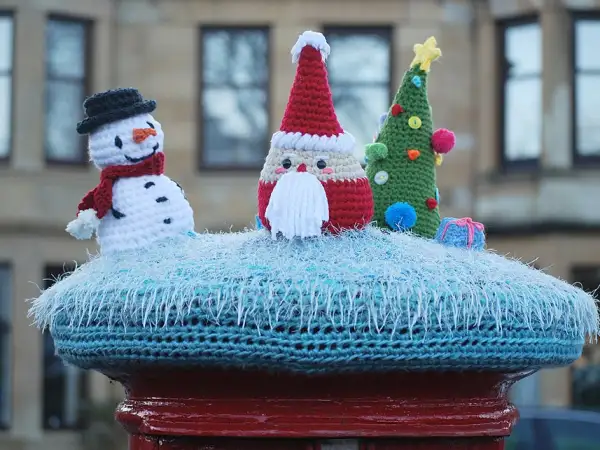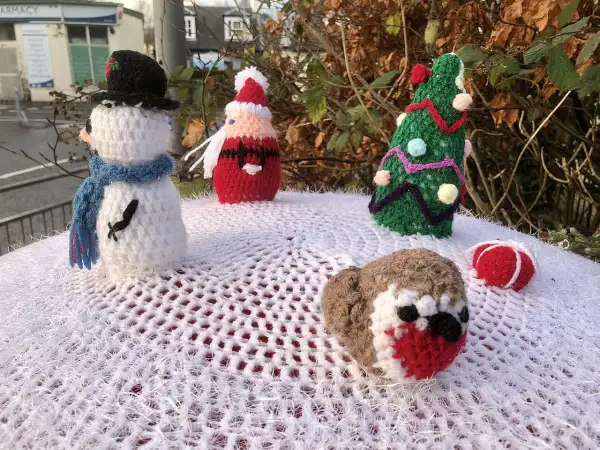
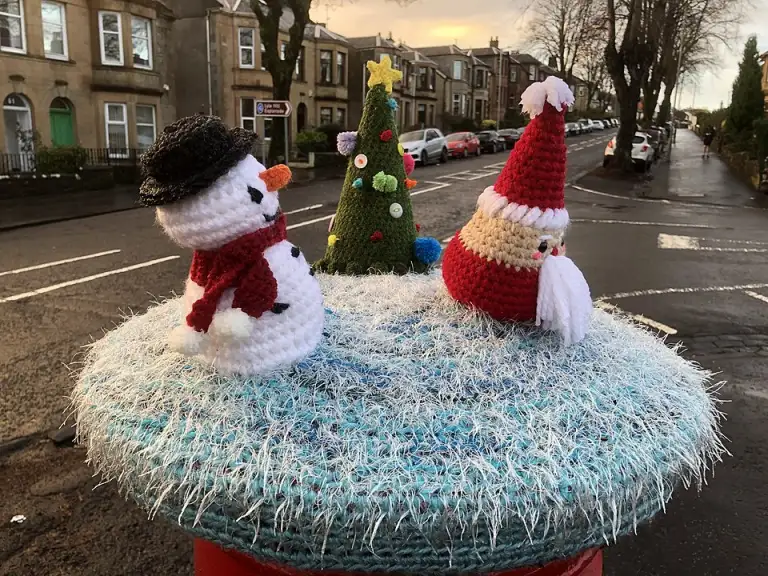
This crochet santa is a cheerful little amigurumi Father Christmas with a red coat, a black belt, a fluffy white beard and a floppy hat topped with a pompom. He is written in UK terms and worked in double crochet in a continuous spiral, with a stitch count at the end of every round.
At a glance: Yarn and hook: DK yarn and a 3.5mm (UK 9) or 3mm (UK 11) hook (US E-4). Time: 4 to 5 hours (flat ornament about 1 hour). Terms: UK, with US conversions.
The body and head are made in one piece, so there is less sewing than you might expect. At the end we also share a quick flat crochet santa face that makes a lovely tree ornament or gift tag.
Why make a crochet santa?
Father Christmas is the star of the season, and a handmade one feels extra special. A crochet santa can sit on the mantelpiece, stand guard by the tree or come out every December as part of the family decorations. If you have been looking for a simple father christmas crochet pattern that you can finish in a weekend, this is it.
The shape is simple: a cone-like body that turns into a round head, two short arms and a hat. The character comes from the details, especially the beard. We show two ways to make it, a loop stitch beard for a shaggy look and a brushed beard for a soft, cloud-like finish.
If you have already made our crochet snowman or crochet gonk, you will recognise the method. This crochet santa pattern uses the same increases and decreases, with a few colour changes along the way.

Crochet santa pattern at a glance
| Detail | Information |
|---|---|
| Skill level | Easy to intermediate (basic amigurumi plus colour changes) |
| Yarn | DK in red, white, black and a skin tone, plus a scrap of yellow |
| Hook | 3.5mm (UK 9, US E-4), or 3mm for a firmer fabric |
| Finished size | About 13 to 15cm tall including the hat, depending on tension |
| Time | 4 to 5 hours (flat ornament about 1 hour) |
| Techniques | Magic ring, dc in a spiral, inc, dc2tog, back loop only, loop stitch, colour changes |
Materials for your crochet santa
- Red DK yarn: around 25 to 30g for the crochet santa coat, arms and hat.
- White DK yarn: about 15g for the beard, hat brim, pompom and trim. A soft acrylic is best if you want to brush the beard.
- Black DK yarn: a few metres for the belt, mittens and boots.
- Skin tone DK yarn: about 8g for the head. Choose any shade you like.
- Yellow or gold scrap: for embroidering the belt buckle.
- 3.5mm crochet hook, a stitch marker, a tapestry needle and toy stuffing.
- Eyes: black yarn for embroidered eyes, or 6mm safety eyes for a decoration only.
- Optional: a small sealed bag of plastic pellets to weight the base, and a pet slicker brush for the brushed beard.
Not sure what DK means? The Craft Yarn Council yarn weight system explains how yarn thicknesses are grouped. DK sits in the light category, number 3.
Abbreviations (UK terms)
This pattern uses UK terms. Our guide to UK vs US crochet terms explains the differences if you usually follow US patterns.
- MR: magic ring
- ch: chain
- ss: slip stitch
- st(s): stitch(es)
- dc: double crochet (US single crochet)
- htr: half treble crochet (US half double crochet)
- inc: 2 dc in the same stitch
- dc2tog: double crochet 2 stitches together
- dc3tog: double crochet 3 stitches together
- BLO: back loop only
- loop st: loop stitch (explained in the beard section)
Tips before you start
- Spiral rounds: do not join rounds unless told to. Mark the first stitch and move the marker up each round.
- Neat colour changes: work the last stitch of the old colour until two loops are left on the hook, then finish it with the new colour. This keeps the stripe crisp.
- Starting in the round: our guide to how to do a crochet magic ring shows the start step by step.
- Count often: the number in brackets is the total stitches at the end of the round.
Crochet santa body and head (one piece)
Start your crochet santa with red yarn at the base of the coat.
Rnd 1: 6 dc in a MR. (6)
Rnd 2: inc in each st around. (12)
Rnd 3: (dc in next st, inc) x6. (18)
Rnd 4: (dc in next 2 sts, inc) x6. (24)
Rnd 5: (dc in next 3 sts, inc) x6. (30)
Rnd 6: BLO dc in each st around. (30)
Rnds 7 to 10: dc in each st around. (30)
Rnd 6 in the back loops makes a neat, flat base so your crochet santa stands up. The unused front loops are used later for the white hem trim.
Change to black for the belt.
Rnds 11 to 12: dc in each st around. (30)
Change back to red.
Rnd 13: dc in each st around. (30)
Rnd 14: (dc in next 3 sts, dc2tog) x6. (24)
Rnd 15: dc in each st around. (24)
Rnd 16: (dc in next 2 sts, dc2tog) x6. (18)
Rnd 17: dc in each st around. (18)
Stuff the body firmly now. If you are using a weighted base, put the sealed bag of pellets in first, then add stuffing on top.
Change to skin tone for the head.
Rnd 18: (dc in next 2 sts, inc) x6. (24)
Rnd 19: (dc in next 3 sts, inc) x6. (30)
Rnds 20 to 24: dc in each st around. (30)
If you are using safety eyes, fit them now between Rnds 21 and 22, about 5 stitches apart. Only use them on a decoration, never on a toy for a young child.
Rnd 25: (dc in next 3 sts, dc2tog) x6. (24)
Rnd 26: (dc in next 2 sts, dc2tog) x6. (18)
Stuff the head firmly.
Rnd 27: (dc in next st, dc2tog) x6. (12)
Rnd 28: dc2tog x6. (6)
Fasten off, thread the tail through the front loops of the last 6 stitches, pull tight and weave in. The main crochet santa shape is now complete.
Hem trim
Turn your crochet santa upside down. Join white yarn to any of the front loops that Rnd 6 left unworked (these are the front loops of Rnd 5). Dc in each front loop around (30), then ss to the first dc and fasten off. This gives the coat a little white fur edge at the bottom.
Belt buckle
With yellow or gold yarn, embroider a small square outline on the front of the belt, about 3 stitches wide and the full height of the 2 black rounds. For a coat front, you can also embroider a straight line of white chain stitch from the hem up to the belt.
Crochet santa arms (make 2)
Start with black for the mittens.
Rnd 1: 6 dc in a MR. (6)
Rnd 2: (dc in next 2 sts, inc) x2. (8)
Rnds 3 to 4: dc in each st around. (8)
Change to white for the cuff.
Rnd 5: dc in each st around. (8)
Change to red.
Rnds 6 to 12: dc in each st around. (8)
Stuff the mitten lightly and leave the rest of the arm unstuffed so it hangs naturally. Flatten the top, then work 4 dc through both layers to close it. (4) Fasten off, leaving a long tail. Sew the arms to the sides of the crochet santa body just below Rnd 17, angled slightly forward.
Boots (optional, make 2)
With black: 6 dc in a MR (6). Next round: (dc in next st, inc) x3 (9). Next round: dc in each st around (9). Fasten off, stuff lightly, flatten and sew to the base so the toes peek out from under the hem.
Face details
- Eyes: if you did not use safety eyes, embroider two small black French knots or short vertical stitches between Rnds 21 and 22, about 5 stitches apart.
- Nose: with skin tone or pale pink, make a MR, work 5 dc into it and pull tight into a tiny bobble. Sew it between and just below the eyes.
- Cheeks: a little pink embroidery, or a touch of blusher brushed on lightly, makes him look rosy.
The beard: loop stitch or brushed
The crochet santa beard is worked flat in rows, starting at the top edge and narrowing to a point. It is then sewn around the lower half of the face.
How to work loop stitch
Insert your hook into the next stitch. Wrap the yarn from back to front over your index finger (or a pencil) to make a loop about 2cm long. Use the hook to catch both strands of yarn behind your finger and pull them through the stitch, so you have 3 loops on the hook. Yarn over and pull through all 3 loops. Slide your finger out. The loop forms on the side of the work facing away from you.
Loop stitch beard
Use white yarn. Ch 13.
Row 1: dc in 2nd ch from hook and in each ch across. (12) Ch 1, turn.
Row 2: loop st in each st across. (12) Ch 1, turn.
Row 3: dc2tog, dc in next 8 sts, dc2tog. (10) Ch 1, turn.
Row 4: loop st in each st across. (10) Ch 1, turn.
Row 5: dc2tog, dc in next 6 sts, dc2tog. (8) Ch 1, turn.
Row 6: loop st in each st across. (8) Ch 1, turn.
Row 7: dc2tog, dc in next 4 sts, dc2tog. (6) Ch 1, turn.
Row 8: loop st in each st across. (6) Ch 1, turn.
Row 9: dc2tog 3 times. (3)
Fasten off, leaving a long tail. The loops sit on the right side of the beard, which faces outwards when you sew it on.
Brushed beard
Work the same rows, but use dc instead of loop st on Rows 2, 4, 6 and 8. Pin the finished piece to a cushion and brush it gently with a pet slicker brush until the fibres fluff up. This works best with acrylic yarn. Brush little and often; it is easy to overdo it.
Moustache
With white yarn, ch 9. Ss in 2nd ch from hook, dc in next ch, htr in next ch, ss in next 2 ch, htr in next ch, dc in next ch, ss in last ch. (8) Fasten off. Pinch the middle and wrap the tail round it a couple of times to shape the two curls.
Attaching the beard
Place the top edge of the beard around the lower face, from cheek to cheek, just under the nose. Sew it on along the top edge only so the point hangs free. Sew the moustache directly under the nose, over the top of the beard.
Crochet santa hat with pompom
The crochet santa hat is worked from the tip down in red, so it gets wider as you go.
Rnd 1: 4 dc in a MR. (4)
Rnd 2: dc in each st around. (4)
Rnd 3: (dc in next st, inc) x2. (6)
Rnd 4: dc in each st around. (6)
Rnd 5: (dc in next st, inc) x3. (9)
Rnd 6: dc in each st around. (9)
Rnd 7: (dc in next 2 sts, inc) x3. (12)
Rnd 8: dc in each st around. (12)
Rnd 9: (dc in next 3 sts, inc) x3. (15)
Rnd 10: dc in each st around. (15)
Rnd 11: (dc in next 4 sts, inc) x3. (18)
Rnd 12: (dc in next 2 sts, inc) x6. (24)
Rnd 13: (dc in next 3 sts, inc) x6. (30)
Rnds 14 to 15: dc in each st around. (30)
Change to white for the brim.
Rnds 16 to 18: dc in each st around. (30)
Ss to the next st and fasten off, leaving a long tail. For a fluffy brim, brush the white rounds gently as for the brushed beard.
Pompom
With white yarn: 6 dc in a MR (6). Next round: inc in each st around (12). Next round: dc in each st around (12). Next round: dc2tog 6 times (6). Stuff lightly, close the hole and sew to the tip of the hat.
Place the hat on the head so the brim sits just above the eyes at the front and lower at the back. Sew all round the brim. Fold the tip over to one side and put a couple of stitches through it to hold the floppy shape.
Flat crochet santa face ornament
This flat crochet santa takes about an hour and uses tiny amounts of yarn. It is perfect for the tree, a gift tag or an appliqué on a stocking. It works well with our crochet reindeer as a matching set.
Face
With skin tone: Rnd 1: 6 dc in a MR. (6) Rnd 2: inc in each st around. (12) Rnd 3: (dc in next st, inc) x6. (18) Ss to the first st. Fasten off.
Hat
With red, ch 10.
Row 1: dc in 2nd ch from hook and in each ch across. (9) Ch 1, turn.
Row 2: dc2tog, dc in next 5 sts, dc2tog. (7) Ch 1, turn.
Row 3: dc in each st across. (7) Ch 1, turn.
Row 4: dc2tog, dc in next 3 sts, dc2tog. (5) Ch 1, turn.
Row 5: dc in each st across. (5) Ch 1, turn.
Row 6: dc2tog, dc in next st, dc2tog. (3) Ch 1, turn.
Row 7: dc3tog. (1)
Fasten off. Brim: join white to the first ch on the underside of the foundation chain, ch 1, dc in each ch across (9), ch 1, turn, dc in each st across (9). Fasten off.
Curly beard
Hold the face with the right side facing you. Join white with a ss to any st of Rnd 3 at one side of the face.
Row 1: ch 1, 2 dc in the same st, then 2 dc in each of the next 8 sts. (18 dc worked over 9 sts) Turn.
Row 2: (ch 5, ss in next st) 18 times. (18 loops)
Fasten off. The chain loops make a curly beard around the lower half of the flat crochet santa face.
Finishing the ornament
Sew the hat over the top edge of the face so the brim covers about 2 rounds. Add a small white pompom or a white bobble (6 dc in a MR, pulled tight) at the tip. Embroider two eyes and a pink nose, and sew on a small moustache: ch 7, ss in 2nd ch from hook, htr in next ch, ss in next 2 ch, htr in next ch, ss in last ch. (6) Finish with a loop of yarn at the back for hanging.

Safety note
A crochet santa looks very cuddly, so think about who will handle him. For babies and young children, embroider the eyes and nose instead of using safety eyes, leave out pellets, beads and buttons, and skip the hanging loop on anything that might end up in a cot or pram.
Sew every part on very firmly and check the seams before giving him away. Loop stitch can be pulled if it is worked loosely, so keep your tension snug or choose the brushed beard for a toy. If you have used safety eyes or pellets, treat your Santa as a decoration and keep him out of reach of little ones.
Styling ideas for your Father Christmas
- Make a little group with a crochet snowman and a crochet reindeer on the mantelpiece.
- Pop your crochet santa beside a crochet Christmas pudding for a festive table centrepiece.
- Give him a tiny sack: a small dc pouch in brown with a chain drawstring.
- Hang several flat faces on a ribbon to make a short garland.
- Sew a flat face onto a stocking cuff or a plain cushion cover.

Troubleshooting your crochet santa
- He will not stand up: check that Rnd 6 was worked in the back loops, and add a weighted base or a firm card circle inside the bottom.
- Jogs at colour changes: a small step is normal in spiral rounds. Keep all changes at the same point and place that at the back.
- The head wobbles: stuff the neck area firmly before you start the head, and keep adding stuffing as you work.
- The hat is too loose: work Rnds 14 to 18 with a hook one size smaller, or skip one plain red round.
- Loops are uneven: wrap around a pencil instead of your finger to keep every loop the same length.
Frequently asked questions about crochet santa
Is this crochet santa pattern suitable for beginners?
A confident beginner can make it. If you can work dc in a spiral, increase and decrease, the only new skills are colour changes and loop stitch, and the brushed beard is an easy alternative to loop stitch.
How tall is the finished crochet santa?
In DK yarn with a 3.5mm hook your crochet santa is about 13 to 15cm tall including the hat. A thicker yarn and bigger hook will make him larger, and 4-ply will make a smaller Santa.
What is the best yarn for a crochet santa beard?
For loop stitch, any smooth white DK works. For a brushed beard, choose an acrylic or acrylic blend, as it fluffs up well. Cotton keeps its shape but does not brush as softly.
Can I make the flat santa face as a gift tag?
Yes. Make the flat face ornament, add a hanging loop and write the name on a small card tied to the loop. It also works as an appliqué on stockings and cushions.
Is a crochet santa safe for babies?
Only if you embroider all the features, leave out pellets and hanging loops, use the brushed beard and sew everything very securely. Otherwise treat him as a decoration and keep him out of reach.