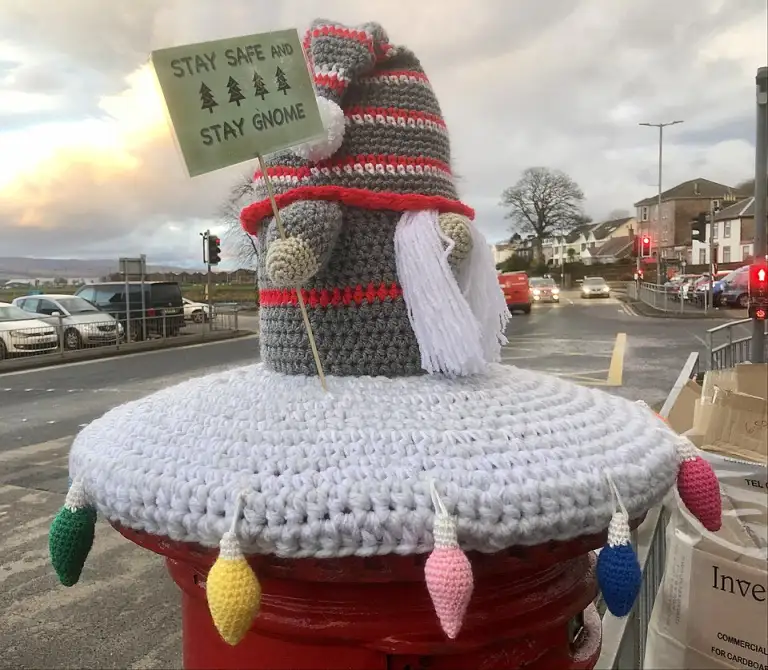
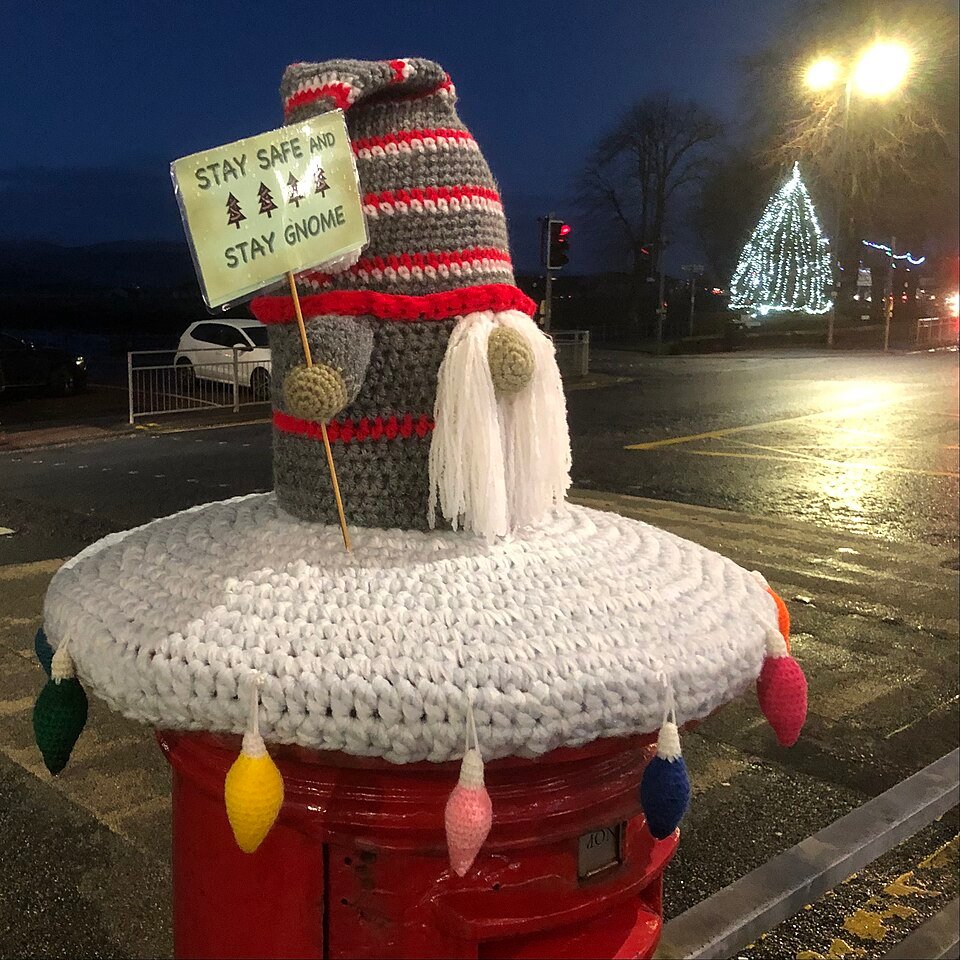
This crochet gonk is a chubby little Christmas gnome with a tall cone hat, a big fluffy beard and a round nose peeping out between them. It is worked in UK terms, mostly in double crochet in the round, and the base is weighted so your crochet gonk stands up on a shelf or mantelpiece without toppling over.
At a glance: Yarn and hook: DK (small) or chunky (large) yarn and a 3.5mm (UK 9) or 5mm (UK 6) hook (US E-4 or H-8). Time: 2 to 4 hours. Terms: UK, with US conversions.
The pattern comes in two sizes, made simply by changing the yarn weight and hook. Every round has its stitch count in brackets, so you can check your work as you go. If you are new to working in the round, we explain the few skills you need before the pattern starts.
What is a crochet gonk?
Gonks are the cheerful Scandinavian gnomes you see everywhere in the run-up to Christmas. In Sweden they are called tomte and in Norway and Denmark nisse.
In the UK the word “gonk” has stuck, and a crochet gonk is simply an amigurumi version of one. The classic look is always the same: no visible face, a hat pulled right down over the eyes, a beard that covers the whole front, and a nose sitting where the two meet. That makes a crochet gnome surprisingly quick to make, because there are no eyes or mouth to embroider.

If you enjoy making little stuffed characters, you will find more ideas in our crochet animals patterns. You can read more about the Japanese art of crocheted and knitted stuffed toys on the Wikipedia page about amigurumi.
Crochet gonk sizes: small and large
This gonk crochet pattern uses exactly the same rounds for both sizes. Only the yarn and hook change. Thicker yarn and a bigger hook make bigger stitches, so the whole gonk grows in proportion.
| Size | Yarn | Hook | Approximate height |
|---|---|---|---|
| Small | DK (light worsted) | 3.5mm (US E-4) | About 15 to 17cm to the hat tip |
| Large | Chunky (bulky) | 5mm (US H-8) | About 24 to 28cm to the hat tip |
Heights are a guide only. They depend on how tightly you crochet, how firmly you stuff and how low the hat sits. For amigurumi it is normal to use a hook a little smaller than the yarn label suggests, so the fabric is dense and the stuffing does not show through. The Craft Yarn Council chart of standard yarn weights is handy if your yarn label uses a different name for the weight.
What you need to make a crochet gonk
- Hat yarn: red is traditional, but grey, green or cream all look lovely. The hat uses the most yarn.
- Body yarn: any colour, as most of the body is hidden behind the beard. Grey or a festive red both work well.
- Beard yarn: white, cream or pale grey. A wool or wool blend, or a soft acrylic, brushes out well. Faux fur or eyelash yarn is another option.
- Nose yarn: a small amount of a skin tone, pink or soft brown.
- Hook: 3.5mm for a small crochet gonk or 5mm for a large one.
- Toy stuffing: polyester fibrefill that is labelled as meeting toy safety standards.
- Weight for the base: a small bag of plastic toy pellets, or a circle of stiff card (see the weighting section).
- Also useful: a stitch marker, a tapestry needle, sharp scissors, a few pins and a pet slicker brush or wire brush if you want a brushed beard.

Abbreviations in UK terms (with US equivalents)
This pattern uses UK terms, with US names in the table. Our guide to UK vs US crochet terms explains the difference in more detail.
| UK term | US term | What it means |
|---|---|---|
| ch (chain) | ch (chain) | Yarn over and pull through the loop on the hook. |
| ss (slip stitch) | sl st (slip stitch) | Insert hook, yarn over and pull straight through the stitch and the loop on the hook. |
| dc (double crochet) | sc (single crochet) | Insert hook, yarn over, pull up a loop, yarn over, pull through both loops. |
| inc | inc | Work 2 dc into the same stitch. |
| dc2tog | sc2tog | Pull up a loop in each of the next 2 stitches, yarn over and pull through all 3 loops. |
| BLO | BLO | Back loop only: work into the loop furthest from you. |
| MR | MR | Magic ring (also called a magic circle). |
Before you start
Every piece of this crochet gnome starts with a magic ring. It closes up tightly so there is no hole at the centre. If you have not made one before, follow our step-by-step guide on how to do a crochet magic ring first.
- Work in a spiral. The body, hat and nose are worked in continuous rounds. Do not join with a slip stitch or chain at the end of each round.
- Use a stitch marker. Place it in the first stitch of each round and move it up as you go. It is very easy to lose your place in a spiral without one.
- Count often. The number in brackets at the end of each round is the total number of stitches you should have.
- Repeats. Instructions in brackets followed by “6 times” mean you work everything inside the brackets, then repeat it until you have done it 6 times in total.
Crochet gonk pattern: the body
The body is a rounded cylinder, worked from the base upwards. Use your body colour. The back loop round creates a neat edge so the base sits flat.
- Round 1: 6 dc into a magic ring. (6)
- Round 2: inc in each st around. (12)
- Round 3: (1 dc, inc) 6 times. (18)
- Round 4: (2 dc, inc) 6 times. (24)
- Round 5: (3 dc, inc) 6 times. (30)
- Round 6: (4 dc, inc) 6 times. (36)
- Round 7: working in BLO, 1 dc in each st around. (36)
- Rounds 8 to 17: 1 dc in each st around. (36) This is 10 rounds.
- Round 18: (4 dc, dc2tog) 6 times. (30)
- Rounds 19 and 20: 1 dc in each st around. (30)
- Round 21: (3 dc, dc2tog) 6 times. (24)
- Rounds 22 and 23: 1 dc in each st around. (24)
Stop here and add the weight and stuffing (see the next section) before you close the top.
- Round 24: (2 dc, dc2tog) 6 times. (18)
- Round 25: (1 dc, dc2tog) 6 times. (12) Top up the stuffing so the top is firm and rounded.
- Round 26: dc2tog 6 times. (6)
Fasten off, leaving a tail. Thread the tail on a tapestry needle, weave it through the front loop of each of the last 6 stitches, pull tight to close the hole, then sew the end into the body.
How to weight the base of your crochet gonk
A weighted base keeps your crochet gonk standing upright, which matters because the tall hat makes it top-heavy. Choose one of these methods.
- Card base: after you finish Round 10, while the body is still wide open, cut a circle of stiff card slightly smaller than the flat base (Rounds 1 to 6). Drop it in so it lies flat on the inside of the base, then carry on crocheting. The card stops the base from bulging, so the crochet gonk stands steadily.
- Pellet bag: put a spoonful or two of plastic toy pellets into a small, strong bag, such as a knotted section cut from a pair of tights or a small fabric pouch sewn closed. After Round 23, push the bag down into the base, then stuff firmly on top of it.
Safety note: if you use plastic pellets, beads, glass beads or any other small loose filling, your crochet gonk is a decoration and not a toy. It is not suitable for children under 3, because the filling could escape if a seam is pulled or chewed. A crochet gonk made for a young child should be filled with toy stuffing only, with no pellets, card, beads, buttons or wire.
Then stuff the rest of the body firmly with toy stuffing, in small pieces for a smooth shape.
How to crochet the tall gonk hat
The hat is a long cone, worked separately from the tip down in your hat colour. It increases by just 3 stitches every third round, which gives the tall, slim point that makes a crochet gonk instantly recognisable.
- Round 1: 6 dc into a magic ring. (6)
- Round 2: 1 dc in each st around. (6)
- Round 3: (1 dc, inc) 3 times. (9)
- Round 4: 1 dc in each st around. (9)
- Round 5: (2 dc, inc) 3 times. (12)
- Rounds 6 and 7: 1 dc in each st around. (12)
- Round 8: (3 dc, inc) 3 times. (15)
- Rounds 9 and 10: 1 dc in each st around. (15)
- Round 11: (4 dc, inc) 3 times. (18)
- Rounds 12 and 13: 1 dc in each st around. (18)
- Round 14: (5 dc, inc) 3 times. (21)
- Rounds 15 and 16: 1 dc in each st around. (21)
- Round 17: (6 dc, inc) 3 times. (24)
- Rounds 18 and 19: 1 dc in each st around. (24)
- Round 20: (7 dc, inc) 3 times. (27)
- Rounds 21 and 22: 1 dc in each st around. (27)
- Round 23: (8 dc, inc) 3 times. (30)
- Rounds 24 and 25: 1 dc in each st around. (30)
- Round 26: (9 dc, inc) 3 times. (33)
- Rounds 27 and 28: 1 dc in each st around. (33)
- Round 29: (10 dc, inc) 3 times. (36)
- Rounds 30 to 32: 1 dc in each st around. (36)
To finish, ss into the next stitch to smooth the step at the end of the spiral. Fasten off, leaving a long tail of about 40cm for sewing the hat to the body.
The finished hat opening has 36 stitches, the same as the widest part of the body, so it slides snugly over the top of the stuffed body. If you want an even taller hat, add one or two extra plain rounds after any of the plain-round sections. The counts stay the same.
Making the crochet gonk beard
The beard is what gives a crochet gonk its character. We give two methods: a brushed fringe beard, which is very fluffy, and a loop stitch beard, which is neater and curly. Both use the same small triangle as a base.
Beard base (both methods)
With beard yarn, work flat in rows. The ch 1 at the start of each row does not count as a stitch.
- Foundation: ch 13.
- Row 1: 1 dc in the 2nd ch from the hook and in each ch across. Turn. (12)
- Row 2: ch 1, 1 dc in each st across. Turn. (12)
- Row 3: ch 1, dc2tog, 1 dc in each of the next 8 sts, dc2tog. Turn. (10)
- Row 4: ch 1, 1 dc in each st across. Turn. (10)
- Row 5: ch 1, dc2tog, 1 dc in each of the next 6 sts, dc2tog. Turn. (8)
- Row 6: ch 1, 1 dc in each st across. Turn. (8)
- Row 7: ch 1, dc2tog, 1 dc in each of the next 4 sts, dc2tog. Turn. (6)
- Row 8: ch 1, 1 dc in each st across. Turn. (6)
- Row 9: ch 1, dc2tog, 1 dc in each of the next 2 sts, dc2tog. Turn. (4)
- Row 10: ch 1, dc2tog twice. Turn. (2)
- Row 11: ch 1, dc2tog. (1)
Fasten off, leaving a long tail for sewing. The wide top edge (Row 1) will sit under the hat, and the point hangs down the front of the body.
Method 1: brushed fringe beard
- Cut lots of strands of beard yarn about 10cm long for the small gonk, or 15cm long for the large one.
- Fold one strand in half. Insert your hook through a stitch on the beard base from front to back, catch the fold and pull it through to make a loop.
- Pull the two loose ends through that loop and tug gently to tighten. This is the same knot used to add a fringe to a scarf.
- Repeat in every stitch of the beard base, row by row, until the front is completely covered.
- Trim the beard into a pointed shape. Then brush it out with a pet slicker brush or a wire brush, working in short strokes from the ends upwards, until the strands separate into a soft, fluffy beard. Trim again if needed.
Method 2: loop stitch beard
Instead of a fringe, you can work the beard base itself in loop stitch, which is a variation of double crochet. Follow the beard base pattern above, but on Rows 2, 4, 6 and 8 work loop stitch in place of each plain dc. Keep the decrease rows as written.
- Insert the hook into the stitch.
- Wrap the working yarn from back to front around a finger of your yarn hand, so it forms a loop about 2cm long behind the work.
- Catch both strands of yarn on either side of the finger with the hook and pull them through the stitch. You now have 3 loops on the hook.
- Yarn over and pull through all 3 loops. Slip your finger out of the loop.
The loops form on the side facing away from you, so that side becomes the front of the beard. Longer loops give a bushier beard.
How to crochet the nose
The nose is a small ball, worked in the round in your nose colour.
- Round 1: 6 dc into a magic ring. (6)
- Round 2: inc in each st around. (12)
- Rounds 3 and 4: 1 dc in each st around. (12)
- Round 5: dc2tog 6 times. (6)
Stuff the nose firmly with a little toy stuffing before the hole gets too small, using the end of your hook to push it in. Fasten off, leaving a tail. Weave the tail through the front loops of the last 6 stitches, pull tight and keep the tail for sewing.
Putting your crochet gonk together
Pin everything in place before you sew, so you can check the proportions.
- Beard: pin the beard to the front of the body with the wide top edge across Round 17 or 18 and the point hanging towards the base. Sew around the edges of the beard base with the long tail, using small stitches that hide under the beard.
- Hat: slide the hat over the top of the body so that the edge sits low and just covers the top edge of the beard. Some gonks have the hat almost down to the base at the back, so try it at different heights. Pin it all the way round.
- Sew the hat: using the long hat tail and a tapestry needle, whip stitch the hat edge to the body all the way round, catching a strand of the body under each stitch.
- Nose: pin the nose in the centre front, half under the hat brim and half over the top of the beard. Sew it in place securely, going round it twice.
- Finishing: weave in all loose ends inside the body. Leave the hat tip floppy, or put a little stuffing into the top of the cone so it stands up and then bends to one side.
Ideas to personalise your crochet gonk
- Striped hat: change colour every few rounds of the hat. Stripes do not change any of the stitch counts.
- Bobble or bell: add a small pompom or sewn-on bell to the hat tip for a decoration. Leave these off a crochet gonk made for a young child.
- Hanging loop: sew a crochet chain loop to the hat tip so a small crochet gonk can hang on the Christmas tree.
A crochet gonk looks lovely next to a little crochet tree. Our crochet Christmas tree pattern is worked in the same way, in double crochet in the round, so the two make a natural pair. For more festive makes, browse our round-up of Christmas crochet ideas.

Troubleshooting common problems
- Stuffing shows through: go down a hook size and crochet more tightly. Do not overstuff, as that stretches the stitches open.
- The crochet gonk falls over: add more weight to the base, check the base is flat rather than domed, and make sure the hat tip is not stuffed too heavily.
- The hat will not fit: if it is too tight, work one extra increase round of (11 dc, inc) 3 times for 39 stitches. If it is too loose, sew it on a little further down where the body is wider.
- Stitch counts do not match: the most common cause is missing the first stitch of a round. Count each round and use a marker.
Frequently asked questions about crochet gonk
Is this crochet gonk pattern suitable for beginners?
Yes, if you can make a magic ring and double crochet. The only other skills are increases, dc2tog decreases and working in the back loop, which are all explained in the abbreviations table.
What is the difference between a gonk and a gnome?
They are the same idea. Gonk is the name most often used in the UK for the Scandinavian Christmas gnome, known as a tomte in Sweden and a nisse in Norway and Denmark.
Can I give a crochet gonk to a baby or toddler?
Only if it is filled with toy stuffing alone and has no pellets, beads, card, bells or buttons. A crochet gonk weighted with pellets or beads is a decoration and is not suitable for children under 3.
How do I make my gonk bigger?
Use thicker yarn and a bigger hook. Chunky yarn and a 5mm hook give a large gonk about 24 to 28cm tall using exactly the same rounds as the small version.
How long does it take to make a crochet gonk?
Most people can make the small size in an evening or two. The fringe beard takes the longest, as each strand is knotted on by hand.
We hope you enjoy making your crochet gonk this Christmas. Make a few in different colours to pop on the shelf or give as gifts.