Crochet animals are one of the most rewarding things you can make with a hook, a little yarn and a bag of toy stuffing. Below are three easy, free beginner patterns in UK and US terms (UK first, with the US equivalents in our table): a round little chick, a chubby whale and a simple bear (with a bunny variation).
Every pattern is worked in the round, amigurumi style, and every round ends with a stitch count in brackets so you can check your work as you go. If you can make a magic ring and a double crochet, you can make these.
What are amigurumi crochet animals?
Amigurumi is the Japanese word for small knitted or crocheted stuffed toys. Most amigurumi crochet animals are made from simple shapes, usually balls and tubes, worked in a continuous spiral of tight double crochet stitches. You can read more about the history of the craft on the Wikipedia amigurumi page.
The good news for beginners is that nearly all crochet animals use the same handful of moves. You start with a magic ring, increase to make a flat circle, work straight rounds to build the sides, then decrease to close the shape. Once you understand that rhythm, you can make almost any animal.

Materials you need for crochet animals
You do not need much to start making crochet animals, and you may already have most of it in your stash.
- Yarn: DK (double knitting) weight cotton or acrylic is ideal. Smooth, light colours are easiest to see while you learn.
- Hook: a hook one or two sizes smaller than the ball band suggests. For DK we use a 3mm or 3.5mm hook. A smaller hook makes a tighter fabric, so the stuffing stays hidden.
- Stitch marker: a locking marker, safety pin or short piece of contrast yarn to mark the first stitch of each round.
- Toy stuffing: polyester toy filling that is labelled as meeting toy safety standards.
- Eyes: plastic safety eyes (8mm to 10mm suit these patterns) or black yarn to embroider the eyes.
- Tapestry needle and scissors: for sewing parts together and weaving in ends.
Safety eyes or embroidered eyes?
Safety eyes have a plastic back washer that locks them in place, and they give a neat, shiny look. They must go in before you close the piece, because you cannot fit the washer once the shape is stuffed and closed.
Embroidered eyes are made with a few small stitches of black yarn or thread. They take a little practice, but they are the safest choice for very young children and they can be added at the end.
Safety note: if your crochet animals are for babies or children under three, embroider the eyes and nose instead of using safety eyes, buttons or beads. Sew every part on securely with several passes of yarn, and check the toy regularly for loose stitches. The NHS has general baby safety and care advice for parents.
Key techniques for crochet animals
These five techniques cover everything in the three patterns below. Practise them once on a scrap ball and the patterns will feel much easier. If you need a refresher on stitch names, see our guide to UK vs US crochet terms.
1. The magic ring
The magic ring (also called a magic circle) lets you start a round piece with no hole in the middle. Wrap the yarn around your fingers, work your first stitches into the loop, then pull the tail tight to close it. Our step-by-step guide shows how to do a crochet magic ring.
2. Working in a spiral
Amigurumi is usually worked in a continuous spiral. That means you do not join each round with a slip stitch or make a turning chain. When you finish a round, simply work the next stitch into the first stitch of the previous round.
Because there is no visible join, place your stitch marker in the first stitch of every round and move it up as you go. Counting your stitches at the end of each round is the single best habit you can build.
3. Increases and the invisible decrease
An increase (inc) means working 2 dc into the same stitch. A decrease (dec) joins 2 stitches into 1. For toys we use the invisible decrease because it leaves no little gaps or bumps.
- Insert your hook into the front loop only of the next stitch.
- Without pulling through, insert it into the front loop only of the following stitch (3 loops on hook).
- Yarn over and pull through the 2 front loops (2 loops on hook).
- Yarn over and pull through both loops to finish the decrease.
4. Stuffing
Most crochet animals need less stuffing than you expect. Start stuffing when the opening is still a little wider than your finger, usually a round or two after you begin decreasing. Pull the stuffing apart into small fluffy pieces and add it a bit at a time. The shape should feel firm but not stretched.
5. Sewing parts on
Crochet animals with separate ears, arms or fins need a little sewing. Leave a long yarn tail on any part you will attach. Pin the part in place first so you can check the position. Then sew around the edge with small stitches, going through both the part and the body, and go round twice for a secure join.
Easy crochet animals for beginners: which shapes are easiest?
Some crochet animals are much easier than others, and the difference is mostly about shape and the number of parts. The easiest crochet animals are made from one simple shape with very little sewing.
| Shape | Examples | Why it is easy |
|---|---|---|
| One ball | Chick, round bird, pumpkin-style shapes | Just increase, work straight, then decrease. No joins. |
| One tapered tube | Whale, snake, caterpillar | Same rounds as a ball, with longer straight sections |
| Head and body | Bear, bunny, snowman | Two simple pieces sewn together, with small ears or arms |
| Many small parts | Reindeer, horses, dressed dolls | More shaping, colour changes and sewing, so better later |
One-piece shapes are easiest because you only need one stitch, double crochet (dc; US single crochet, sc), plus regular increases and decreases. Every round grows or shrinks by the same number of stitches, so you can spot a mistake as soon as your count is off.
Looking for more crochet animal patterns? Once the chick feels comfortable, try our crochet chicken pattern, which builds on the same ball shape. For the festive season, our crochet snowman uses a simple head and body, and the crochet reindeer is a good next step when you are ready for more parts.
Abbreviations and pattern notes
All three crochet animals below use UK crochet terms. The US equivalent is shown in brackets.
| Abbreviation | UK term | US term |
|---|---|---|
| ch | chain | chain |
| ss | slip stitch | slip stitch |
| dc | double crochet | single crochet (sc) |
| inc | 2 dc in the same stitch | 2 sc in the same stitch |
| dec | invisible decrease (2 dc together) | invisible decrease (sc2tog) |
| (n) | stitch count at the end of the round | stitch count at the end of the round |
- Work in a continuous spiral unless told otherwise. Do not join rounds.
- “(2 dc, inc) x6” means: work 1 dc in each of the next 2 stitches, then 2 dc in the next stitch, and repeat that sequence 6 times in total.
- “dc in each st” means 1 dc in every stitch around.
- Finished sizes are approximate and depend on your yarn and tension.
Pattern 1: Round little chick (easy crochet animals for beginners)
This chick is one ball with a beak and two tiny wings. It is the perfect first project because it uses only the basic increase and decrease rounds. It is roughly 5cm to 6cm tall in DK yarn.
You need: DK yarn in yellow (about 15m) and a scrap of orange, a 3mm or 3.5mm hook, two 8mm safety eyes or black yarn, stuffing and a tapestry needle.
Chick body
Round 1: Using yellow, 6 dc into a magic ring. (6)
Round 2: Inc in each st around. (12)
Round 3: (1 dc, inc) x6. (18)
Round 4: (2 dc, inc) x6. (24)
Round 5: (3 dc, inc) x6. (30)
Rounds 6 to 11: Dc in each st around. (30) [6 rounds]
If using safety eyes, fit them now between Rounds 8 and 9, about 6 stitches apart.
Round 12: (3 dc, dec) x6. (24)
Round 13: (2 dc, dec) x6. (18)
Start stuffing now and keep adding as you go.
Round 14: (1 dc, dec) x6. (12)
Round 15: Dec x6. (6)
Fasten off, leaving a tail. Thread the tail onto your needle, weave it through the front loop of each of the last 6 stitches and pull tight to close. Weave in the end.
Chick beak
Round 1: Using orange, 4 dc into a magic ring. (4)
Round 2: (1 dc, inc) x2. (6)
Fasten off with a long tail. Do not stuff. Sew the beak between the eyes, slightly lower.
Chick wings (make 2)
Round 1: Using yellow, 6 dc into a magic ring. (6)
Round 2: (1 dc, inc) x3. (9)
Rounds 3 to 4: Dc in each st around. (9) [2 rounds]
Fasten off with a long tail. Do not stuff. Flatten each wing and sew one to each side of the body, level with the eyes.
Pattern 2: Chubby whale
Of all our crochet animals, the whale is the most fun to stuff. It is a single shaped piece that starts at the head and tapers to the tail, with two small side fins and a tail fin. It is about 10cm to 12cm long in DK yarn.
You need: DK yarn in blue or grey (about 25m), a 3mm or 3.5mm hook, two 8mm or 9mm safety eyes or black yarn, stuffing and a tapestry needle.
Whale body
Round 1: 6 dc into a magic ring. (6)
Round 2: Inc in each st around. (12)
Round 3: (1 dc, inc) x6. (18)
Round 4: (2 dc, inc) x6. (24)
Round 5: (3 dc, inc) x6. (30)
Round 6: (4 dc, inc) x6. (36)
Rounds 7 to 12: Dc in each st around. (36) [6 rounds]
If using safety eyes, fit them now between Rounds 9 and 10, about 9 stitches apart.
Round 13: (4 dc, dec) x6. (30)
Round 14: Dc in each st around. (30)
Round 15: (3 dc, dec) x6. (24)
Round 16: Dc in each st around. (24)
Round 17: (2 dc, dec) x6. (18)
Stuff the head and body firmly.
Round 18: Dc in each st around. (18)
Round 19: (1 dc, dec) x6. (12)
Round 20: Dc in each st around. (12)
Round 21: (2 dc, dec) x3. (9)
Round 22: Dc in each st around. (9)
Round 23: (1 dc, dec) x3. (6)
Add a little more stuffing to the tail end, keeping it lighter than the body. Fasten off, close the last 6 stitches as for the chick and weave in the end.
Whale side fins (make 2)
Round 1: 6 dc into a magic ring. (6)
Round 2: (1 dc, inc) x3. (9)
Rounds 3 to 4: Dc in each st around. (9) [2 rounds]
Fasten off with a long tail. Do not stuff. Flatten and sew one fin to each side, a few rounds behind the eyes.
Whale tail fins (make 2)
Round 1: 5 dc into a magic ring. (5)
Round 2: Inc in each st around. (10)
Rounds 3 to 5: Dc in each st around. (10) [3 rounds]
Fasten off with a long tail. Do not stuff. Flatten both pieces and sew them side by side to the tip of the tail, angled out in a V shape.
For a finishing touch, embroider a small smile with black yarn and a few white straight stitches on top of the head for a water spout.
Pattern 3: Simple bear (with a bunny variation)
This bear has a separate head and body, which is how many larger crochet animals are built. Change the ears and you have a bunny. The finished bear is roughly 11cm to 13cm tall in DK yarn.
You need: DK yarn in a main colour (about 40m) and a scrap of cream for the muzzle, a 3mm or 3.5mm hook, two 8mm or 9mm safety eyes or black yarn, black yarn for the nose, stuffing and a tapestry needle.
Bear head
Round 1: 6 dc into a magic ring. (6)
Round 2: Inc in each st around. (12)
Round 3: (1 dc, inc) x6. (18)
Round 4: (2 dc, inc) x6. (24)
Round 5: (3 dc, inc) x6. (30)
Round 6: (4 dc, inc) x6. (36)
Rounds 7 to 12: Dc in each st around. (36) [6 rounds]
If using safety eyes, fit them now between Rounds 9 and 10, about 7 stitches apart.
Round 13: (4 dc, dec) x6. (30)
Round 14: (3 dc, dec) x6. (24)
Round 15: (2 dc, dec) x6. (18)
Stuff the head firmly.
Round 16: (1 dc, dec) x6. (12)
Round 17: Dec x6. (6)
Fasten off, close the last 6 stitches and weave in the end.
Bear body
Round 1: 6 dc into a magic ring. (6)
Round 2: Inc in each st around. (12)
Round 3: (1 dc, inc) x6. (18)
Round 4: (2 dc, inc) x6. (24)
Round 5: (3 dc, inc) x6. (30)
Rounds 6 to 10: Dc in each st around. (30) [5 rounds]
Round 11: (3 dc, dec) x6. (24)
Round 12: Dc in each st around. (24)
Round 13: (2 dc, dec) x6. (18)
Round 14: Dc in each st around. (18)
Fasten off, leaving a long tail. Stuff the body firmly, then sew the open end to the underside of the head, going round twice.
Bear ears (make 2)
Round 1: 6 dc into a magic ring. (6)
Round 2: Inc in each st around. (12)
Rounds 3 to 4: Dc in each st around. (12) [2 rounds]
Fasten off with a long tail. Do not stuff. Flatten and sew to the top of the head.
Bear muzzle
Round 1: Using cream, 6 dc into a magic ring. (6)
Round 2: Inc in each st around. (12)
Round 3: Dc in each st around. (12)
Fasten off with a long tail. Embroider a small nose with black yarn, then sew the muzzle below the eyes, adding a pinch of stuffing before you close it.
Bear arms (make 2)
Round 1: 6 dc into a magic ring. (6)
Round 2: (1 dc, inc) x3. (9)
Rounds 3 to 7: Dc in each st around. (9) [5 rounds]
Fasten off with a long tail. Stuff lightly and sew to the sides of the body, just below the neck.
Bear legs (make 2)
Round 1: 6 dc into a magic ring. (6)
Round 2: Inc in each st around. (12)
Rounds 3 to 5: Dc in each st around. (12) [3 rounds]
Fasten off with a long tail. Stuff and sew to the base of the body so the bear can sit.
Bunny variation: long ears (make 2)
Round 1: 6 dc into a magic ring. (6)
Round 2: (1 dc, inc) x3. (9)
Rounds 3 to 9: Dc in each st around. (9) [7 rounds]
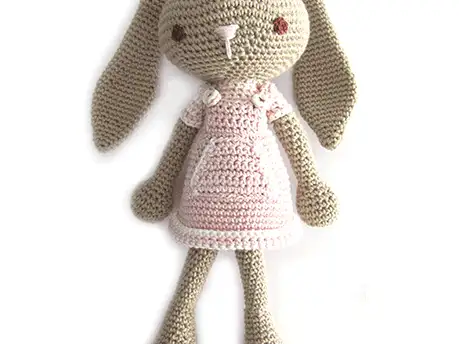
Fasten off with a long tail. Do not stuff. Flatten and sew the ears to the top of the head instead of the bear ears. Add a small white pom-pom or a 6-stitch ball as a tail.

Choosing yarn for crochet animals
The yarn you choose changes how your toy looks and feels. Here is a quick comparison of common choices.
| Yarn type | Good for | Things to know |
|---|---|---|
| Cotton DK | Crisp stitch definition, neat faces | Firm and less stretchy, so it can be tougher on the hands |
| Acrylic DK | Everyday toys, bright colours, easy washing | Soft and widely available; check the ball band for washing advice |
| Chenille or velvet yarn | Extra soft, cuddly toys | Stitches are hard to see, so it is better once you are confident |
| Fluffy or mohair-style yarn | Fuzzy textures | Not suitable for babies, as fibres can shed |
For your first crochet animals, choose a smooth, light-coloured DK. Dark and fluffy yarns make it hard to see where to put your hook. The Craft Yarn Council hook size chart is handy if you are converting between metric and US hook sizes, and our guide to choosing crochet hooks explains the different hook styles.

Troubleshooting your crochet animals
Almost every maker meets these problems early on. They are easy to fix.
Gaps between stitches
Gaps are the most common issue with crochet animals, and they usually mean your fabric is too loose. Go down a hook size and try again. Some makers also find that the “yarn under” method (catching the yarn from underneath on the first yarn over of each dc) makes tighter, neater stitches.
Stuffing showing through
This is also a tension issue, or a sign of over-stuffing. Use a smaller hook, and add stuffing in small pieces rather than one big lump. Stuffing that is stretched too hard will push between the stitches.
Wonky faces
A face gives crochet animals their character, so take your time. Before fixing safety eyes, try them in place without the washers and look at the face from a distance. Count stitches between the eyes so both sides match. For sewn parts, pin everything first and take a step back before you sew.
Wrong stitch count
If your count is off, the most common causes are a missed first stitch or a moved marker. Pull back to the start of the round and work it again. It is quicker than trying to fudge it later.
How to make cute crochet animals: faces and proportions
The same body can look sweet or slightly odd depending on a few small choices. These simple rules help you make cute crochet animals every time.
- Make the head big. A head that is as large as, or larger than, the body gives a baby-like look. The bear above uses 36 stitches for the head and 30 for the body for this reason.
- Place the eyes low. Eyes set around the middle of the head, or just below, look friendlier than eyes near the top.
- Space the eyes a little wide. A wider gap tends to look cuter than eyes close together. Count the stitches between them so both sides match.
- Keep limbs short and round. Small, stubby arms and legs suit most toy designs.
- Add tiny details last. A few straight stitches for eyebrows, or a little pink embroidery for cheeks, add character without adding parts.
| Safety eyes | Embroidered eyes | |
|---|---|---|
| Look | Neat and shiny | Soft and hand-drawn |
| When to add | Before the piece is closed | Any time, even at the end |
| Under-3s | Not recommended | The safer choice |
Crochet stuffed animals for babies and under-3s: stuffing and toy safety
Crochet stuffed animals are a lovely gift for a new baby, but toys for babies and children under three need extra care. Small parts that come loose can be a choking hazard.
- No small hard parts. Leave out safety eyes, buttons, beads, bells and plastic noses. Embroider the eyes and nose with yarn instead.
- No long ties. Avoid ribbons, cords and keyring loops on baby toys.
- Crochet the details. Use a small crocheted ball for a bunny tail rather than a loose pom-pom.
- Work tightly. A small hook and firm dc (US sc) stitches keep the stuffing inside.
- Use proper toy stuffing. Choose polyester filling labelled as suitable for toys, and avoid fluffy yarns that shed.
- Sew parts on twice. Go round each join at least twice and weave the ends deep inside the body.
- Check regularly. Look for loose stitches or worn seams and repair or remove the toy if needed.
For sleeping babies, follow the NHS safe-sleep advice and keep the cot clear of soft toys. If you plan to sell handmade toys, check the toy safety rules that apply where you live first.
Gift ideas with crochet animals
Handmade crochet animals make thoughtful presents, and small ones can be finished in an evening.
- New baby gift: pair an embroidered-eye bunny with our easy crochet baby booties.
- Easter basket: a few little chicks in spring colours.
- Keyrings and bag charms: make the chick in 4-ply yarn with a smaller hook and attach a keyring loop (not for young children).
- Christmas tree decorations: add a hanging loop to the chick or whale. See our crochet Christmas tree ornaments for more ideas.
- Seasonal table set: combine a bear with our easy crochet pumpkin pattern for an autumn display.
Want a bunny with long floppy ears? Try our full crochet bunny pattern with stitch counts for every round.
Frequently asked questions about crochet animals
Are crochet animals hard for beginners?
No. Most simple crochet animals use only a magic ring, double crochet, increases and decreases. Start with a one-piece shape like the chick, count your stitches every round and you will soon be ready for toys with more parts.
What yarn is best for crochet animals?
Smooth DK cotton or acrylic is the easiest to work with. Use a hook one or two sizes smaller than the ball band suggests so the fabric is tight and the stuffing does not show.
Are safety eyes safe for babies?
For babies and children under three, we recommend embroidering the eyes and nose with yarn instead of using safety eyes, buttons or beads. Sew all parts on securely and check the toy regularly.
Why can I see the stuffing through my crochet?
Your stitches are probably too loose, or the toy is over-stuffed. Go down a hook size, keep your tension firm and add stuffing in small pieces.
How long does it take to make crochet animals?
As a rough guide, the chick takes about 1 hour, the whale about 1.5 to 2 hours and the bear about 3 hours, including sewing. Your first toy will take longer while you learn the techniques.
What are the easiest crochet animals to make?
One-piece ball or tube shapes, such as a chick, a round bird or a whale, are the easiest. They use only double crochet (US single crochet), increases and decreases, with little or no sewing.
Are crochet stuffed animals safe for babies?
They can be, if you make them with care. Embroider the eyes and nose, leave out buttons, beads and long ties, work tight stitches, use toy-safe stuffing and sew every part on securely. Keep soft toys out of the cot while a baby sleeps.
Start your first crochet animals today
Crochet animals are a lovely way to practise working in the round, and each one teaches you something new. Begin with the chick, move on to the whale, then try the bear and bunny once you are happy sewing parts together.
Keep counting your stitches, keep your tension firm and have fun giving every toy its own little face. Once you have made one, you will find yourself planning the next.