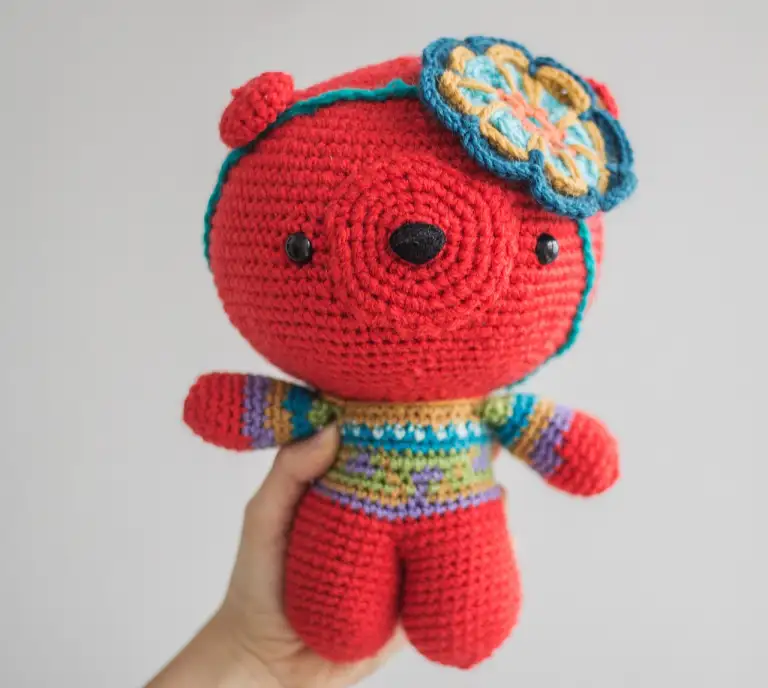
A crochet teddy bear is the classic handmade toy: soft, huggable and the kind of gift that gets kept for years. This one is made from simple parts (a round head, a body, two arms, two legs, two ears and a little muzzle), each worked in spiral rounds of double crochet, so it is a lovely project if you have made one or two small amigurumi before.
This free crochet teddy bear pattern is written in UK terms with US conversions. Every round has a stitch count, there is a parts diagram so you can see how everything fits together, a size chart for different yarn weights, and safety tips if the bear is for a baby. In DK yarn your teddy will be about 20cm tall.
Quick answer: To crochet a teddy bear, make a head, body, two arms, two legs, two ears and a muzzle, each starting with 6 dc in a magic ring and worked in spiral rounds of double crochet with increases and decreases. Stuff the head, body, legs and paws, embroider the face, then sew the parts together. In DK yarn with a 3mm hook the bear is about 20cm tall and takes 5 to 7 hours.
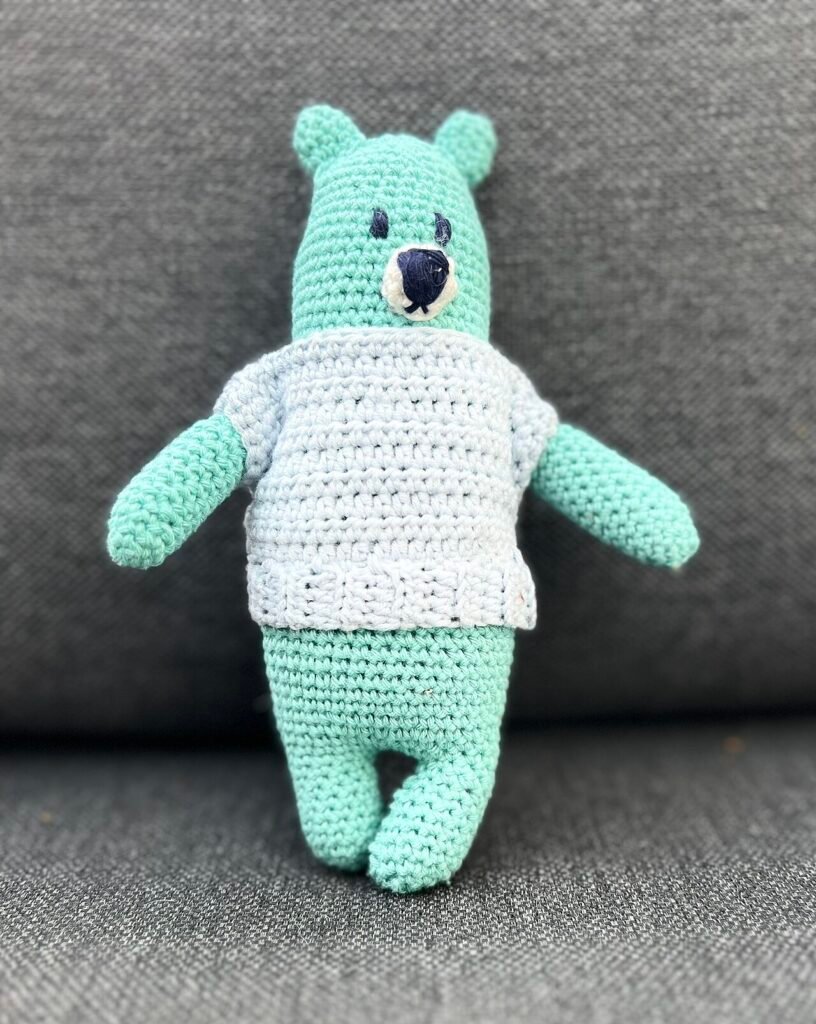
Why you will love this crochet teddy bear
- Only one stitch. The whole bear is double crochet (US single crochet), with simple increases and decreases.
- Classic shape. A round head, a pear-shaped body and chunky legs with flat soles, so the bear sits up on a shelf.
- Quick to finish. Most people make it in 5 to 7 hours, so you can still finish one in time for Christmas.
- Easy to change. Swap the yarn weight to make a tiny pocket bear or a big cuddly one.
Every part starts with a magic ring. If you have not made one before, our magic ring tutorial walks you through it step by step. If you would like an easier first toy, try our crochet bunny, which uses the same techniques with fewer parts.
What you need
| Item | What to use |
|---|---|
| Main yarn | About 60 to 70g DK (light worsted) in brown, honey or cream |
| Muzzle yarn | A few metres of DK in a lighter colour, such as cream or beige |
| Hook | 3mm (UK 11, US C-2/D-3) |
| Stuffing | About 50g polyester toy filling |
| Face | Black or dark brown yarn or embroidery thread for the eyes and nose (or 8mm safety eyes for older children) |
| Extras | Stitch marker, tapestry needle, pins, scissors |
Use a hook that is a little smaller than the yarn label suggests. Tight stitches stop the stuffing from showing through, which is the secret to a neat amigurumi bear. For toys given to children, look for stuffing labelled as meeting the EN71 toy safety standard; the RoSPA toy safety advice is a useful guide.
Abbreviations (UK terms)
| UK term | US term | Meaning |
|---|---|---|
| MR | MR | magic ring |
| dc | sc | double crochet (US single crochet) |
| inc | inc | 2 dc in the same stitch |
| dec | dec | dc 2 stitches together (invisible decrease recommended) |
| BLO | BLO | back loop only |
| sl st | sl st | slip stitch |
| (…) x6 | (…) x6 | repeat the steps in brackets 6 times |
Work in continuous spiral rounds without joining. Place a stitch marker in the first stitch of each round and move it up as you go. The number at the end of each round is the stitch count.
Crochet teddy bear parts
The diagram shows all the parts you will make and where they go. The head and body are the biggest pieces; the arms, legs, ears and muzzle are quick.
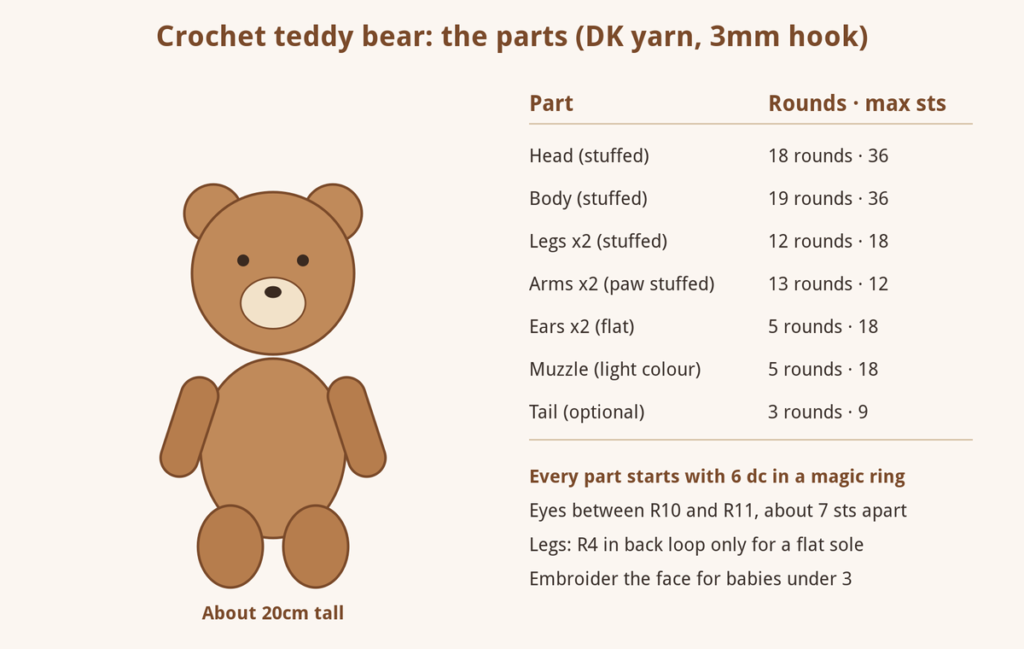
Free crochet teddy bear pattern
Head (main colour)
R1: 6 dc in MR. (6)
R2: inc x6. (12)
R3: (1 dc, inc) x6. (18)
R4: (2 dc, inc) x6. (24)
R5: (3 dc, inc) x6. (30)
R6: (4 dc, inc) x6. (36)
R7 to R13: dc in each st around. (36) 7 rounds.
R14: (4 dc, dec) x6. (30)
R15: (3 dc, dec) x6. (24)
R16: (2 dc, dec) x6. (18)
Embroider the eyes now (see the face section below), or fix safety eyes between R10 and R11, about 7 stitches apart. Stuff the head firmly.
R17: (1 dc, dec) x6. (12)
R18: dec x6. (6)
Fasten off, thread the tail through the front loops of the last 6 stitches and pull closed.
Muzzle (lighter colour)
R1: 6 dc in MR. (6)
R2: inc x6. (12)
R3: (1 dc, inc) x6. (18)
R4 to R5: dc in each st around. (18)
Sl st in the next st and fasten off, leaving a long tail for sewing. Embroider the nose on the muzzle before you attach it.
Ears (make 2, main colour)
R1: 6 dc in MR. (6)
R2: inc x6. (12)
R3: (1 dc, inc) x6. (18)
R4 to R5: dc in each st around. (18)
Fasten off with a long tail. Do not stuff. Flatten each ear into a half circle.
Body (main colour)
R1 to R6: work as for the head. (36)
R7 to R12: dc in each st around. (36) 6 rounds.
R13: (4 dc, dec) x6. (30)
R14 to R15: dc in each st around. (30)
R16: (3 dc, dec) x6. (24)
R17 to R18: dc in each st around. (24)
R19: (2 dc, dec) x6. (18)
Stuff the body firmly, especially the base so the bear sits well. Fasten off, leaving a long tail to sew on the head.
Arms (make 2, main colour)
R1: 6 dc in MR. (6)
R2: inc x6. (12)
R3 to R4: dc in each st around. (12)
R5: (2 dc, dec) x3. (9)
R6 to R13: dc in each st around. (9) 8 rounds.
Stuff the paw end lightly and leave the top unstuffed so the arm hangs naturally. Flatten the opening and work 4 dc across through both layers to close. Fasten off with a long tail.
Legs (make 2, main colour)
R1: 6 dc in MR. (6)
R2: inc x6. (12)
R3: (1 dc, inc) x6. (18)
R4: dc in BLO in each st around. (18) This makes the flat sole.
R5 to R6: dc in each st around. (18)
R7: (1 dc, dec) x6. (12)
R8 to R12: dc in each st around. (12) 5 rounds.
Stuff firmly and fasten off, leaving a long tail for sewing.
Tail (optional, main colour)
R1: 6 dc in MR. (6)
R2: (1 dc, inc) x3. (9)
R3: dc in each st around. (9)
Fasten off and sew to the back of the body near the base.
Making up your crochet teddy bear
- Muzzle: pin the muzzle to the lower half of the face, between the eyes and R16. Add a little stuffing and sew it on with the long tail.
- Ears: pin each ear on top of the head, roughly between R4 and R7, curving them slightly forwards. Sew along the bottom edge.
- Head to body: place the head on the open top of the body, with the muzzle facing forwards. Sew all the way round, adding a little extra stuffing in the neck so the head does not wobble.
- Arms: sew the flat top of each arm to the sides of the body, 1 or 2 rounds below the neck.
- Legs: sit the bear down and pin the legs to the front of the base so the soles point forwards. Sew them on firmly. Check that the bear sits up before you fasten off.
- Weave in all the ends inside the body.
Embroidering the face
An embroidered face is the safest choice for babies and young children, and it gives your teddy a sweet, vintage look.
- Eyes: with black yarn, work 3 or 4 small vertical stitches over 1 round, between R10 and R11, about 7 stitches apart.
- Nose: on the muzzle, stitch a small triangle by working horizontal stitches over the top 2 rounds, getting shorter as you go down.
- Mouth: make a short straight stitch down from the nose, then two small slanting stitches for a smile.
Pin the eyes and muzzle in place and look at the bear from a distance before you sew. Moving the eyes by even one stitch changes the expression a lot.
Crochet teddy bear size chart
| Yarn weight | Hook | Approximate height | Main yarn |
|---|---|---|---|
| 4 ply (fingering) | 2.5mm | 15cm | 35 to 40g |
| DK (light worsted) | 3mm | 20cm | 60 to 70g |
| Aran (worsted) | 4mm | 26cm | 100 to 120g |
| Chunky (bulky) | 5 to 6mm | 32cm | 170 to 200g |
Heights are for the bear standing, measured from the top of the ears to the soles. The stitch counts stay the same for every size; only the yarn and hook change.
Safety tips for a baby’s teddy bear
- Embroider the face instead of using safety eyes or buttons for babies and children under 3.
- Sew every part on twice, going round each seam a second time, and give each part a firm tug to test it.
- Crochet tightly so no stuffing can be pulled out through the stitches.
- Skip ribbons and bows around the neck. Long ties are a hazard for small children.
Ways to personalise your teddy
- Paw pads: make 2 small circles (R1 to R2 of the head) in the muzzle colour and sew them onto the soles.
- Scarf: chain 50, then work 1 row of dc for a little winter scarf. Leave it off for babies.
- Christmas bear: crochet the body in red to look like a jumper, or add a tiny version of our crochet Santa hat.
- Baby gift set: pair the bear with our crochet baby cardigan in a matching colour.
Looking for more toys to make? Our round-up of crochet animals has lots more ideas, from easy beginner shapes to bigger projects.
Common problems and how to fix them
The stuffing shows through
Your stitches are too loose. Go down half a hook size, and try the yarn under method for double crochet, which makes tighter stitches.
The head flops forwards
Add more stuffing to the top of the body and the bottom of the head before you sew them together, and sew through both pieces twice.
The bear will not sit up
Stuff the base of the body more firmly, and move the legs a little further forwards so they act as a stand.
The decreases leave holes
Use the invisible decrease: insert the hook through the front loops only of the next 2 stitches, then finish the double crochet as normal.
Frequently asked questions about crochet teddy bears
Is a crochet teddy bear hard to make?
No. It only uses double crochet, increases and decreases in spiral rounds. If you have made a small amigurumi before, you can make this teddy bear.
How long does it take to crochet a teddy bear?
About 5 to 7 hours in DK yarn, including stuffing, sewing the parts together and embroidering the face.
How much yarn do I need for a crochet teddy bear?
About 60 to 70g of DK yarn in the main colour, a few metres in a lighter colour for the muzzle, and some black yarn for the face.
What is the best yarn for a crochet teddy bear?
A smooth cotton or acrylic DK yarn shows the stitches clearly and washes well. For an extra soft bear, try a chenille or velvet yarn with a larger hook, but count stitches carefully as they are harder to see.
Can I make this crochet teddy bear pattern in US terms?
Yes. Use US single crochet wherever the pattern says dc. All the stitch counts stay the same.