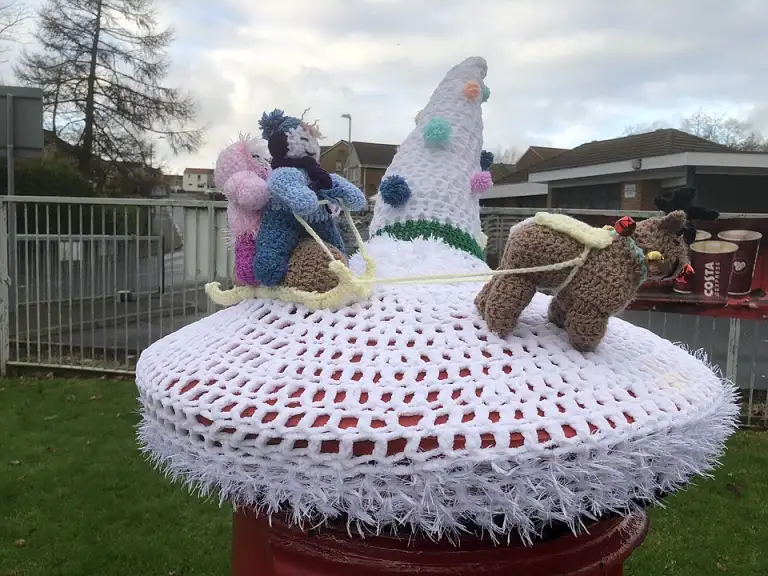
This crochet reindeer is a small sitting amigurumi worked in tight spirals of UK double crochet. The head and body are made separately, then you add four chunky legs, soft ears, a muzzle, a little tail and branching antlers made with a simple chain-and-dc method. Add a bright red nose and you have a festive red-nosed reindeer for the run-up to Christmas.
At a glance: Yarn and hook: DK yarn and a 3.5mm (UK 9) hook (US E-4). Time: 3 to 4 hours. Terms: UK, with US conversions.
Our crochet reindeer pattern gives exact rounds and stitch counts for every piece, plus clear notes on safety eyes, stuffing and putting it all together. It is a lovely next step if you have made our crochet gonk and want to try a toy with a few more parts.
About this crochet reindeer
The finished crochet reindeer sits roughly 12 to 14cm tall to the tips of its antlers when made in DK yarn with a 3.5mm hook. The exact size depends on your tension and how firmly you stuff it.
- Skill level: easy, with some sewing together.
- Construction: head, body, legs and muzzle worked in continuous rounds, then sewn together.
- Antlers: worked flat in one row along a chain, with short branches.
- Time: about 3 to 4 hours, including making up.
- Terms: UK, with US equivalents in the abbreviations table.
If you enjoy little toys, take a look at our collection of crochet animals for more ideas to make alongside your reindeer.

Materials for your crochet reindeer
- DK yarn in mid brown for the head, body, ears and legs, about 30 to 40g.
- DK yarn in dark brown for the hooves, a small amount.
- DK yarn in cream or light tan for the muzzle, tail and antlers, about 10g.
- A scrap of red DK for the bright nose, or dark brown for a classic nose.
- 3.5mm crochet hook (UK 9 / US E-4). A hook a little smaller than the ball band suggests keeps the fabric tight so the stuffing does not show.
- Polyester toy stuffing.
- Two 8mm safety eyes, or black yarn or embroidery thread to embroider the eyes.
- Stitch marker, tapestry needle, scissors and dressmaking pins.
Acrylic and cotton DK both work well. Cotton gives crisp stitch definition, while acrylic is softer and a little lighter. This style of small stuffed toy is known as amigurumi, and the same basic shapes appear in almost every animal you will make.
Abbreviations and tips
| Abbreviation | Meaning (UK) | US term |
|---|---|---|
| MR | magic ring | magic ring |
| ch | chain | chain |
| ss | slip stitch | slip stitch |
| dc | double crochet | single crochet (sc) |
| inc | 2 dc in the same stitch | 2 sc in the same stitch |
| dc2tog | double crochet 2 stitches together (decrease) | sc2tog |
| BLO | back loop only | back loop only |
| (30) | number of stitches at the end of the round | same |
Work in continuous spirals without joining. Place a stitch marker in the first stitch of each round and move it up as you go. New to the starting technique? Our guide on how to do a crochet magic ring walks you through it, and our UK vs US crochet terms chart helps if you usually follow American patterns.
For neater decreases, work dc2tog through the front loops only of the two stitches. This is often called an invisible decrease and leaves fewer gaps.
Crochet reindeer pattern: head
Use mid brown. The magic ring sits at the top of the head and the decreases close up the neck end.
Round 1: 6 dc in MR. (6)
Round 2: inc in each st around. (12)
Round 3: [1 dc, inc] 6 times. (18)
Round 4: [2 dc, inc] 6 times. (24)
Round 5: [3 dc, inc] 6 times. (30)
Rounds 6 to 10: 1 dc in each st around. (30) That is 5 rounds.
Fit the safety eyes now, between Rounds 7 and 8, about 7 stitches apart. Check the position from the front before you push the backs on firmly. If you are embroidering the eyes instead, do it after the head is stuffed and closed.
Round 11: [3 dc, dc2tog] 6 times. (24)
Round 12: [2 dc, dc2tog] 6 times. (18)
Stuff the head firmly, shaping it into a round ball.
Round 13: [1 dc, dc2tog] 6 times. (12)
Round 14: dc2tog 6 times. (6)
Add a little more stuffing if needed. Fasten off, thread the tail through the front loops of the last 6 stitches, pull tight to close and weave in the end.
Crochet reindeer pattern: body
Use mid brown. The body is worked from the base upwards, so the magic ring sits underneath the reindeer.
Round 1: 6 dc in MR. (6)
Round 2: inc in each st around. (12)
Round 3: [1 dc, inc] 6 times. (18)
Round 4: [2 dc, inc] 6 times. (24)
Round 5: [3 dc, inc] 6 times. (30)
Round 6: [4 dc, inc] 6 times. (36)
Rounds 7 to 12: 1 dc in each st around. (36) That is 6 rounds.
Round 13: [4 dc, dc2tog] 6 times. (30)
Rounds 14 and 15: 1 dc in each st around. (30)
Round 16: [3 dc, dc2tog] 6 times. (24)
Round 17: 1 dc in each st around. (24)
Round 18: [2 dc, dc2tog] 6 times. (18)
Round 19: 1 dc in each st around. (18)
Stuff the body firmly, keeping the base flat so the reindeer sits up.
Round 20: [1 dc, dc2tog] 6 times. (12)
Fasten off, leaving a 30cm tail for sewing. Top up the stuffing so the neck is firm. Leave this end open.
Muzzle, nose, ears, legs and tail
Muzzle
Use cream or light tan.
Round 1: 6 dc in MR. (6)
Round 2: inc in each st around. (12)
Round 3: [1 dc, inc] 6 times. (18)
Rounds 4 and 5: 1 dc in each st around. (18)
Fasten off, leaving a 25cm tail. Stuff lightly so the muzzle is a soft dome.
Nose options
For a bright red nose, use red DK. For a classic nose, use dark brown.
Round 1: 6 dc in MR. (6)
Round 2: inc in each st around. (12)
Round 3: 1 dc in each st around. (12)
Round 4: dc2tog 6 times. (6)
Push a small amount of stuffing or yarn scraps inside, fasten off leaving a 20cm tail and close the gap. For a simpler classic nose, you can embroider a small triangle of satin stitch in dark brown on the muzzle instead.
Ears (make 2)
Use mid brown.
Round 1: 4 dc in MR. (4)
Round 2: [1 dc, inc] 2 times. (6)
Round 3: [2 dc, inc] 2 times. (8)
Round 4: [3 dc, inc] 2 times. (10)
Rounds 5 and 6: 1 dc in each st around. (10)
Fasten off, leaving a 20cm tail. Do not stuff. Flatten each ear and pinch the open end in half so it cups slightly.
Legs (make 4)
Start with dark brown for the hoof.
Round 1: 6 dc in MR. (6)
Round 2: inc in each st around. (12)
Round 3: 1 dc BLO in each st around. (12)
Round 4: 1 dc in each st around. (12)
Change to mid brown.
Rounds 5 to 8: 1 dc in each st around. (12) That is 4 rounds.
Fasten off, leaving a 25cm tail. Stuff the hoof end firmly and the top half lightly so the legs bend a little where they meet the body.

Tail
Use cream or light tan.
Round 1: 5 dc in MR. (5)
Round 2: [1 dc, inc] 2 times, 1 dc. (7)
Round 3: 1 dc in each st around. (7)
Fasten off, leaving a 15cm tail. Do not stuff.
How to make crochet reindeer antlers
The antlers are worked flat in a single row. You make a main chain, called the beam, and grow little branches off it by chaining and then working back down each branch in dc before carrying on along the beam. Use cream or light tan. Make 2.
Ch 11.
- 1 dc in 2nd ch from hook, 1 dc in each of next 2 ch. (3 dc on the beam, this is the tip)
- First branch: ch 4, 1 dc in 2nd ch from hook, 1 dc in each of next 2 ch. (3 dc on the branch)
- Continue along the beam: 1 dc in each of next 3 ch of the main chain. (6 dc on the beam so far)
- Second branch: ch 3, 1 dc in 2nd ch from hook, 1 dc in next ch. (2 dc on the branch)
- Continue along the beam: 1 dc in each of the last 4 ch of the main chain. (10 dc on the beam in total)
Check your count: the main chain has 11 chains, you skip 1, and work into the other 10 (3 + 3 + 4). Fasten off, leaving a 20cm tail for sewing. The tail end is the base of the antler.
Both antlers are made the same way. When you sew them on, turn one over so the branches mirror each other. For stiffer antlers, work them with a 3mm hook and pull each stitch snug. Cotton yarn also holds its shape better than acrylic.

Assembling your crochet reindeer
Pin every piece in place before you sew. It is much easier to move a pin than to unpick a seam, and you can check the reindeer from all sides first.
- Muzzle. Pin the muzzle to the front of the head, centred below the eyes, roughly over Rounds 8 to 12. Add a little more stuffing as you sew around the edge with whip stitch.
- Nose. Sew the nose to the upper front of the muzzle.
- Antlers. Sew the base of each antler to the top of the head, between Rounds 3 and 4, about 6 stitches apart. Sew through the first two or three stitches of the beam so the antler stands up.
- Ears. Sew the ears just outside and slightly below the antlers, around Rounds 5 and 6.
- Head to body. Place the open neck of the body against the underside of the head, where you closed it. Using the long body tail, whip stitch all the way round twice for a firm join.
- Legs. Sew the two back legs to the sides of the body near the base, pointing forwards, so the reindeer sits. Sew the two front legs to the front of the body under the head, hanging down.
- Tail. Sew the tail to the back of the body, about 3 rounds up from the base.
If you did not use safety eyes, embroider the eyes now with black yarn, working a few small satin stitches between Rounds 7 and 8. A tiny white stitch in each eye adds a sparkle.
Safety notes for a crochet reindeer
Handmade toys are lovely gifts, but small parts need care.
- Safety eyes are not suitable for children under 3. For babies and toddlers, embroider the eyes and nose with yarn instead.
- Sew every piece on securely with several passes of yarn, and check the antlers, ears and nose with a firm tug.
- Do not add beads, buttons, bells or wire to a toy meant for a child. Pipe cleaners in the antlers are only for a decoration kept out of reach.
- Use toy stuffing and tight stitches so the filling cannot be pulled out.
- Check handmade toys regularly for loose threads or worn seams.
Red-nosed and other crochet reindeer variations
- Bright red nose. The red nose option above gives a cheerful red-nosed reindeer that suits a Christmas gift or a shelf display.
- Scarf. Ch 41 in red or green, then 1 dc in 2nd ch from hook and each ch along. (40 dc) Tie it around the neck.
- Snowy reindeer. Work the head, body and ears in cream, with light brown antlers and a pale pink or red nose.
- Hanging ornament. Thread a loop of yarn through the top of the head, between the antlers, and hang your crochet reindeer on the tree.
- Bigger reindeer. Use chunky yarn and a 5mm hook with exactly the same rounds for a larger toy.
- Rosy cheeks. Rub a little pink blusher on the cheeks for an adult decoration, or embroider small pink circles for a child’s toy.

Troubleshooting your crochet reindeer
| Problem | Likely cause | Fix |
|---|---|---|
| Stuffing shows through | Loose tension | Go down 0.5mm in hook size and stuff a little less |
| Head wobbles | Neck not stuffed firmly | Add stuffing to the neck before sewing and stitch round the join twice |
| Reindeer falls over | Rounded base | Press the base flat while stuffing and sew the back legs low down |
| Antlers flop | Soft yarn or loose stitches | Use a smaller hook and cotton yarn, and sew through more of the beam |
| Stitch count is out | Missed the first stitch of a round | Use a stitch marker and count at the end of every round |
Gifting and displaying your crochet reindeer
A crochet reindeer makes a thoughtful gift for a teacher, a friend or a Secret Santa swap. Tuck it into a small box with tissue paper, or tie a gift tag around its neck with ribbon.
For a festive scene, sit a crochet reindeer on the mantelpiece next to a gonk or a row of small trees, such as our spiral crochet Christmas tree. A pair of reindeer in different colours looks lovely on a windowsill.
Store your crochet reindeer in a box away from damp after Christmas, and give it a gentle hand wash in cool water if it gets grubby. Reshape it and leave it to dry flat.
Frequently asked questions about the crochet reindeer
Is this crochet reindeer pattern suitable for beginners?
Yes, if you can make a magic ring and work double crochet, increases and dc2tog decreases. The trickiest part is sewing the pieces together, so take your time and pin everything first.
Can I give a crochet reindeer to a baby?
Safety eyes are not suitable for children under 3. For a baby or toddler, embroider the eyes and nose with yarn, leave off any beads or wire, and sew every piece on very securely.
How do I stop the antlers flopping?
Work the antlers with a 3mm hook in cotton yarn and keep your stitches tight. Sew through the first few stitches of the beam, not just the end, so the antler is held upright.
How big is the finished crochet reindeer?
In DK yarn with a 3.5mm hook it is roughly 12 to 14cm tall to the tips of the antlers. Chunky yarn and a 5mm hook make a larger reindeer from the same rounds.
Can I make a red-nosed version?
Yes. Make the nose in red DK and sew it to the front of the muzzle. It turns the reindeer into a bright red-nosed Christmas friend.
We hope you enjoy making your crochet reindeer. Once you have the basic shapes, you can adapt the same head, body and legs for all sorts of woodland animals.