Slip stitch crochet is the smallest and simplest stitch you will ever learn, yet it turns up in almost every pattern you will ever make. It joins rounds, closes seams, moves your yarn across a row without adding height, and even makes a stretchy ribbing for hat brims and cuffs.
Quick answer: A slip stitch (UK ss, US sl st) is made by inserting the hook, catching the yarn and pulling it straight through both the stitch and the loop on your hook. It adds almost no height, so it is used to join rounds, close seams, move across a row and make stretchy ribbing.
First you will learn slip stitch crochet step by step, then we walk through seven easy ways to use it. You will also find a short practice swatch, tension tips, the most common mistakes and a quick FAQ.
What is slip stitch crochet?
A slip stitch is a crochet stitch with almost no height. You insert the hook, catch the yarn and pull it through the stitch and the loop on your hook in one movement. That is all there is to it.
Because it is so short, a slip stitch is mostly used as a working stitch rather than a fabric stitch. It holds things together, tidies edges and gets your hook where it needs to be. When you do use it to make fabric, slip stitch crochet produces a dense, firm texture that looks a little like knitting.
UK and US names in slip stitch crochet
Good news for anyone who has been confused by UK and US crochet terms: the slip stitch has the same name on both sides of the Atlantic. Only the abbreviation tends to differ.
| Term | UK pattern | US pattern |
|---|---|---|
| Name | Slip stitch | Slip stitch |
| Usual abbreviation | ss | sl st |
| How it is worked | Exactly the same | Exactly the same |
Some UK patterns also write “sl st”, so do not worry if you see both. Other stitches do change name, though. A UK double crochet (dc) is a US single crochet (sc), for example. Our guide to UK vs US crochet terms has the full conversion list.
What you need to practise slip stitch crochet
- Yarn: a smooth, light-coloured DK yarn. Pale colours make it much easier to see each stitch.
- Hook: a 4.5mm or 5mm hook. That is half a size or a full size larger than you would usually use with DK yarn, for reasons we explain in the tension section.
- Scissors and a yarn needle for weaving in ends.
If you are not sure which hook to pick, our guide to crochet hooks explains sizes and materials. You can also check metric and US hook sizes side by side on the Craft Yarn Council hook size chart.

How to do slip stitch crochet step by step
Start with a slip knot on your hook and make a short chain of 16 ch. Then follow these steps.
- Insert the hook. Push the hook into the 2nd chain from the hook. On later rows or rounds, insert it into the next stitch as your pattern tells you.
- Yarn round hook. Wrap the yarn over the hook from back to front.
- Pull through both. Draw the yarn through the chain (or stitch) and straight through the loop already on your hook, in one smooth movement.
- Check your hook. You should have 1 loop left on the hook. One slip stitch is done.
Repeat in each chain across. Try to keep the loop on your hook sitting on the thick part of the shaft, not squeezed up near the tip. That small habit makes the next stitch much easier to get into.
If you only remember one thing, remember this: a slip stitch is “insert, yarn round, pull through everything”. There is no second yarn round hook, which is why it stays so short.
7 easy ways to use slip stitch crochet
Once you can do slip stitch crochet, you will spot it everywhere. Here are the seven jobs it does most often.
1. Joining rounds
When you crochet in the round and your pattern says “join with ss”, you work a slip stitch into the top of the first stitch of the round. If the round began with a turning chain that counts as a stitch, you join into the top of that chain instead. Your pattern will tell you which.
The joining slip stitch does not count as a stitch. Do not work into it on the next round, or your count will creep up by one each time.
2. Moving across a row without adding height
Sometimes you need to move your hook along a few stitches without building the fabric up. Slip stitches let you “walk” across the top of the work. This is common when shaping armholes, starting a new round a few stitches along, or moving to the corner space in a granny square.
Work this kind of slip stitch crochet loosely so the fabric underneath does not pucker.
3. Joining motifs and a slip stitch seam
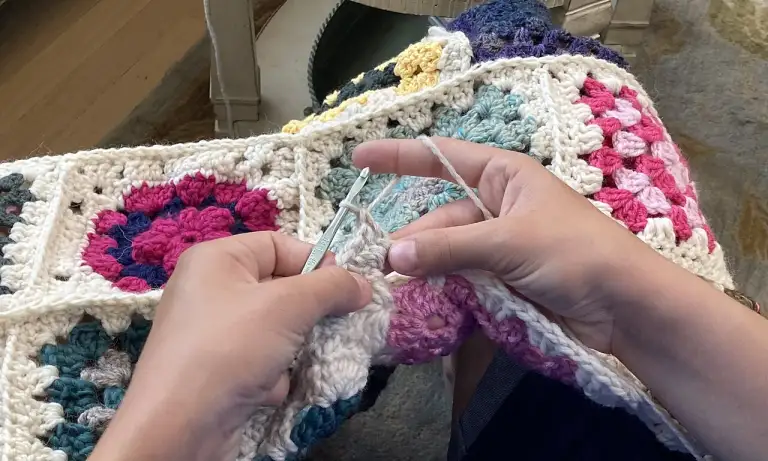
In slip stitch crochet, a slip stitch seam is a quick, firm way to join squares, hexagons or garment pieces. Place two pieces together, line up the edge stitches, and insert your hook through both layers. Work a slip stitch, then repeat along the edge.
- Right sides together: the seam sits on the inside and is almost invisible from the front.
- Wrong sides together: you get a neat raised ridge on the front, which looks lovely in a contrast colour.
Our cosy granny stripe blanket is a good project to practise neat edges on before you try joining motifs.

4. Surface slip stitch (surface crochet)
Surface slip stitch lets you “draw” lines on finished crochet. Hold the yarn at the back of the fabric. Insert your hook from the front, through a gap between stitches, catch the yarn and pull a loop to the front. Then insert the hook into the next gap, catch the yarn at the back again and pull it through the fabric and the loop on your hook.
Surface slip stitch crochet is perfect for adding stripes to a plain blanket, tartan-style checks, or simple outlines. Keep the stitches the same length as the stitches underneath so the fabric stays flat.
5. Slip stitch edging
A single round of slip stitch around the edge of a project gives a clean, firm finish. It is handy on the edges of coasters, bags and blankets that tend to stretch or wave. Work one slip stitch into each stitch along the top, and space them evenly along the row ends.
Because slip stitch crochet is so firm, an edging like this can pull an edge in slightly. If that happens, go up a hook size for the edging only.
6. Slip stitch crochet ribbing for hat brims and cuffs
Slip stitches worked in rows into the back loop only make a stretchy, knit-look rib. It is worked sideways: the length of your chain becomes the depth of the brim, and you keep adding rows until the strip fits around your head or wrist. Then you join the short ends with a slip stitch seam.
The back loop is the loop furthest away from you as you look at the top of the stitch. Working only into that loop leaves the front loop as a little ridge, and those ridges stack up into ribs.
7. Closing the magic ring round
Many hats and amigurumi start with a magic ring. Once you have worked the first round of stitches into the ring and pulled the tail to close it, you usually join the round with a slip stitch into the first stitch. If you are new to the technique, our guide on how to do a crochet magic ring takes you through it step by step.
Some amigurumi patterns work in a continuous spiral instead and do not join with a slip stitch at all. Always follow what your pattern says.
Slip stitch crochet practice swatch: ribbing
This little slip stitch crochet swatch teaches you to make even stitches and to find the back loop. It is also the start of a real hat brim or cuff, so it is time well spent.
You need: DK yarn and a 5mm hook.
Foundation: Make 16 ch.
Row 1: ss in 2nd ch from hook and in each ch across, 1 ch, turn. (15 sts)
Row 2: ss in back loop only of each st across, 1 ch, turn. (15 sts)
Rows 3 to 20: Repeat Row 2. (15 sts)
Fasten off. The 1 ch at the end of each row does not count as a stitch. After a few rows you will see raised ridges forming. Each pair of rows makes one rib.
Count your stitches at the end of every row. The first stitch of a row is easy to miss because it sits right next to the turning chain, and the last stitch is small and tucked away.
Turning the swatch into a brim
To make a brim, keep repeating Row 2 until the strip, slightly stretched, reaches comfortably around the head. Join the first and last rows with a slip stitch seam. You can then work the body of the hat into the row ends along one long edge. Choose a hat pattern that tells you how many stitches to pick up.
Slip stitch crochet tension tips
Slip stitch crochet is naturally tight. With almost no height, there is very little give in each one, so many people find their hook will barely go into the next row. These tips help.
- Go up a hook size. If your yarn label suggests 4mm, try 4.5mm or 5mm for slip stitch crochet fabric.
- Use the shaft, not the tip. Slide each loop down onto the widest part of the hook before you pull through.
- Relax your yarn hand. Let a little more yarn flow through your fingers than you would for double crochet.
- Do not yank. Pull through gently. A firm tug closes the loop and makes the next stitch hard to find.
- Swatch first. Make a small sample and check that your hook goes in easily before starting a whole project.
When slip stitches are only used for joining or moving across, a slightly firm tension is fine. It is when slip stitch crochet becomes the whole fabric, as in ribbing, that relaxing your tension matters most.
Common slip stitch crochet mistakes
Everyone makes these when they start slip stitch crochet. Knowing what to look for saves a lot of frogging.
- Pulling too tight. The most common problem by far. Go up a hook size and keep loops on the shaft.
- Joining into the wrong stitch. When joining a round, check whether your pattern wants you to join into the first stitch or into the top of the starting chain.
- Counting the join as a stitch. The joining slip stitch is not part of your count. Skip over it on the next round.
- Adding an extra yarn round hook. If you yarn round hook twice, you have made a double crochet instead.
- Using the wrong loop. For ribbing, it must be the back loop only. Working into both loops gives a flat, firm fabric with no ribs.
- Missing the last stitch. Slip stitches at the end of a row are tiny. Count every row until you can see them easily.
Slip stitch vs double crochet (UK)
Beginners learning slip stitch crochet often mix up the slip stitch and the UK double crochet, because both start the same way. The difference is in what happens after you pull up a loop.
| Slip stitch (ss) | Double crochet (dc) | |
|---|---|---|
| US name | Slip stitch (sl st) | Single crochet (sc) |
| Steps | Insert, yarn round hook, pull through stitch and loop on hook in one go | Insert, yarn round hook, pull through stitch (2 loops), yarn round hook, pull through both |
| Height | Almost none | Short, about as tall as it is wide |
| Main job | Joining, seams, edging, moving across | Making firm, dense fabric |
Once you are happy with both, the taller stitches follow the same pattern of adding wraps. Try our guides to half treble crochet and treble crochet next.
Where to go next
Slip stitch crochet is one of those skills that quietly improves everything else you make. Neater joins, flatter seams and tidier edges all come from getting this one tiny stitch right.
Practise the ribbing swatch, then try joining a couple of granny squares with a slip stitch seam. If you would like to know more about the history of the craft, the Wikipedia article on crochet is a good place to start.
Frequently asked questions about slip stitch crochet
Is a slip stitch the same in UK and US crochet?
Yes. The slip stitch is worked the same way and has the same name in both. UK patterns usually shorten it to ss and US patterns to sl st.
Does a slip stitch count as a stitch?
When it is used to join a round, it usually does not count, and you do not work into it on the next round. When you work rows of slip stitches as fabric, such as ribbing, each one does count.
Why are my slip stitches so tight?
Slip stitches have almost no height, so there is very little give. Go up a hook size, keep each loop on the widest part of the hook, and pull through gently.
What is the difference between a slip stitch and double crochet?
For a slip stitch you pull the yarn through the stitch and the loop on your hook in one movement. For a UK double crochet (US single crochet) you pull up a loop first, then yarn round hook and pull through both loops, which adds height.
Can you make a whole project in slip stitch crochet?
Yes. Slip stitches worked in the back loop only make a stretchy, knit-look rib that suits hat brims, cuffs and even whole scarves. Use a larger hook than usual and keep your tension relaxed.