
Crochet fingerless gloves keep your hands warm while leaving your fingers free for typing, scrolling, gardening or holding a hot drink. They are also one of the quickest wearable projects you can make, and a pair uses very little yarn.
At a glance: Yarn and hook: DK yarn and a 4mm (UK 8) hook (US G-6). Time: an evening or two per glove. Terms: UK, with US conversions.
This fingerless gloves crochet pattern uses the simplest, most reliable method we know. You crochet a flat rectangle in half treble stitches with a ribbed cuff section, then fold it in half and seam the side with slip stitches, leaving a gap for your thumb. There is no shaping and no working in the round.
The pattern is written in UK terms with exact counts for three sizes, plus a longer wrist warmer variation. If you can work a half treble crochet and a slip stitch, you can make these crochet fingerless gloves.
Why make crochet fingerless gloves?
Fingerless gloves are warm where it counts, over the wrist and the back of the hand, but they never get in the way. They are ideal for chilly offices, the walk to school, or an evening crocheting in a cold room.
Making crochet fingerless gloves flat is especially friendly for beginners. You only ever work back and forth in rows, you can count every stitch easily, and you can try the rectangle around your hand before you seam it. If it is too loose or too tight, you simply add or remove a couple of rows.
A pair also makes a lovely small gift. Each glove takes an evening or two, and the size is easy to adjust.

How these crochet fingerless gloves are constructed
It helps to picture the shape before you start. Each glove begins as a rectangle.
- The foundation chain runs from the wrist end to the knuckle end, so the chain sets the length of the glove.
- Each row adds width, and the total width goes around your hand.
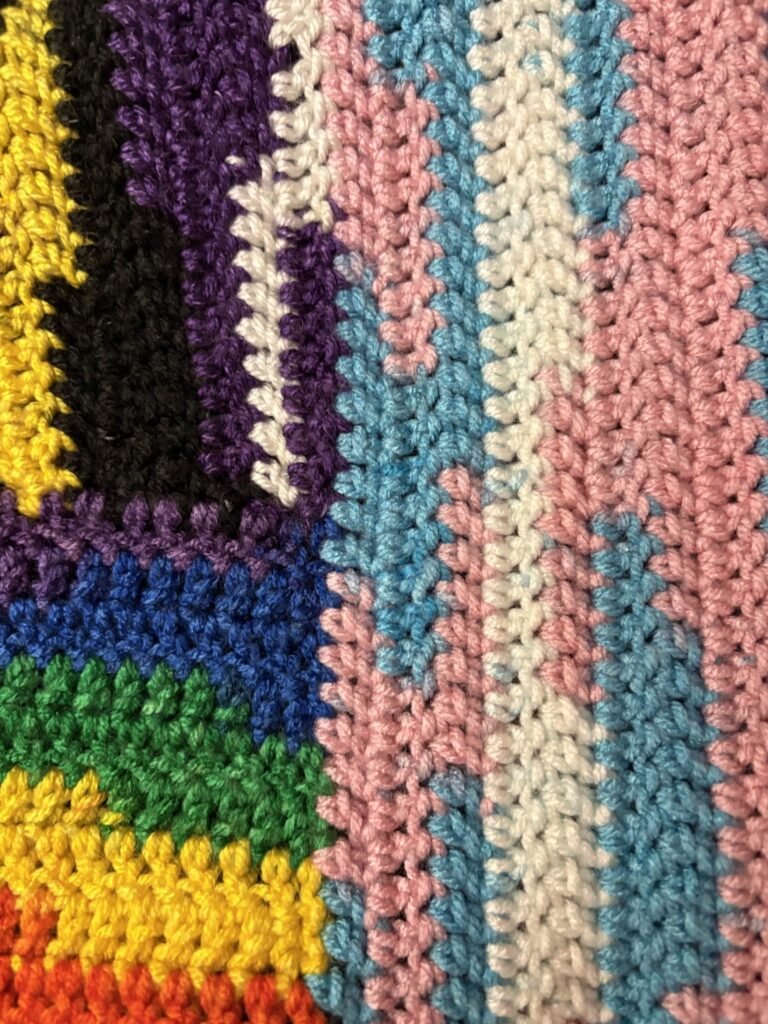
- The 10 stitches at the wrist end of every row form the cuff. They are worked in the back loop only, which creates stretchy ribs like knitted ribbing.
- The rest of each row forms the hand, worked in both loops for a smoother, firmer fabric.
- Once the rectangle is finished, you fold it so the first and last rows meet and seam them together, skipping a few stitches to leave the thumb hole.
Because back loop and both loop half trebles are the same height, the rectangle stays straight. The cuff is simply more stretchy than the hand.
What you need
To make one pair of crochet fingerless gloves, gather the following.
- Yarn: DK weight. For the pair, allow about 50g for size S, 50g to 60g for size M and 60g to 70g for size L. These are estimates, so for M and L buy two 50g balls to be safe.
- Hook: 4mm.
- Notions: a stitch marker, scissors and a blunt yarn needle.
A soft wool blend or acrylic works well. Choose a smooth, light colour so you can see your stitches clearly. Our guide to crochet yarn explains the different fibres and weights, and the Craft Yarn Council yarn weight system shows where DK sits among the standard weights.
Choosing yarn for crochet fingerless gloves
Your hands move all day, so the yarn needs to be comfortable and hard-wearing. A smooth DK in a wool blend or a soft acrylic is a safe choice for crochet fingerless gloves. Both have a little natural stretch, which helps the ribbed cuff spring back after you pull the gloves on.
Avoid very fluffy or textured yarns for a first pair. They make it hard to see the back loops in the cuff section. Pure cotton also has little stretch, so the gloves may feel stiff and loosen over time.
If the gloves are a gift, choose a yarn that can go in the washing machine on a wool or gentle cycle. Check the ball band before you buy.
Abbreviations (UK terms)
| Abbreviation | UK term | US term |
|---|---|---|
| ch | chain | chain |
| ss | slip stitch | slip stitch |
| dc | double crochet | single crochet (sc) |
| htr | half treble crochet | half double crochet (hdc) |
| blo | back loop only | back loop only |
| st(s) | stitch(es) | stitch(es) |
Need a refresher on any of these? See our guides to half treble crochet and the slip stitch, or our full UK vs US crochet terms chart.
Sizing your crochet fingerless gloves
Getting the size right is the key to crochet fingerless gloves that stay put. Measure around the widest part of your hand, across the knuckles, not including the thumb. Then pick the size closest to your measurement.
| Size | Hand circumference | Finished width (flat rectangle) | Finished length |
|---|---|---|---|
| S | 17cm to 19cm | about 17.5cm (21 rows) | about 16cm |
| M | 19cm to 21cm | about 19cm (23 rows) | about 17.5cm |
| L | 21cm to 23cm | about 21cm (25 rows) | about 19cm |
The gloves are designed to be slightly smaller than your hand so they hug gently and do not slip down. The ribbed cuff stretches over your hand easily.
Tension
About 16 htr and 12 rows to 10cm, worked in both loops with a 4mm hook. Tension matters more for crochet fingerless gloves than for a scarf, because the fit depends on it. If your stitches are bigger, try a 3.5mm hook; if they are smaller, try 4.5mm. You can also adjust the number of rows, as long as the total stays odd.

Fingerless gloves crochet pattern: step by step
The pattern is written for size S, with sizes M and L in brackets, like this: S (M, L). Where only one number is given, it applies to all sizes. Make two the same; the gloves fit either hand.
Foundation chain
Ch 28 (30, 32).
Row 1
Htr in 3rd ch from hook (the skipped 2 ch do not count as a stitch) and in each ch to the end. Turn. (26 (28, 30) htr)
You are now at the end of the foundation chain where you made the slip knot. This is the cuff end. Place a stitch marker on this edge so you always know which end is which.
Row 2
Ch 2 (does not count as a stitch), htr blo in each of the first 10 sts for the cuff, then htr in both loops in each of the remaining 16 (18, 20) sts. Turn. (26 (28, 30) htr)
Row 3
Ch 2 (does not count as a stitch), htr in both loops in each of the first 16 (18, 20) sts, then htr blo in each of the last 10 sts. Turn. (26 (28, 30) htr)
Repeat
Repeat Rows 2 and 3 until you have worked 21 (23, 25) rows in total, ending with a Row 3. You should finish at the cuff end. Do not fasten off.
Before seaming, wrap the rectangle around your hand with the cuff at your wrist. The two long edges should just meet with a gentle stretch. If it is too loose, pull back 2 rows; if it is too tight, work 2 more rows (one Row 2 and one Row 3).
Quick stitch count check
| S | M | L | |
|---|---|---|---|
| Foundation chain | 28 | 30 | 32 |
| Stitches per row | 26 | 28 | 30 |
| Cuff (blo) stitches | 10 | 10 | 10 |
| Hand stitches | 16 | 18 | 20 |
| Total rows | 21 | 23 | 25 |
Seaming crochet fingerless gloves with a thumb gap
Seaming joins the last row to the foundation chain, so the rectangle becomes a tube. You leave a short section open for the thumb.
- Fold the rectangle in half so the last row lies along the foundation chain, with the side you want on the outside facing inwards. Your hook is at the cuff end.
- Cuff and lower hand seam: working through both layers (the top of each stitch of the last row and the matching chain of the foundation), ss in each of the first 12 (13, 13) sts.
- Thumb gap: fasten off, leaving a 15cm tail. Skip the next 7 (8, 9) sts on both layers. This opening is your thumb hole.
- Upper hand seam: join the yarn with a ss through both layers in the next pair of stitches, then ss through both layers in each remaining st to the end. That is 7 (7, 8) ss in total, including the joining ss.
- Fasten off and weave in all the ends along the seam.
- Turn the glove right side out so the seam is on the inside. Your first glove is done; make the second one the same way to complete your crochet fingerless gloves.
Check your seam counts: 12 + 7 + 7 = 26 for S, 13 + 8 + 7 = 28 for M, and 13 + 9 + 8 = 30 for L. Each matches the stitches in a row.
Keep your slip stitches relaxed. A tight seam can pucker and will not stretch with the rest of the glove. Our slip stitch crochet guide has tips on keeping them even.
Finishing touches
Optional top edging
For a neater knuckle edge, join yarn at the seam on the top opening and work a round of dc around it, working into the row ends. Aim for about 3 dc for every 2 row ends, and keep the round relaxed. Join with a ss to the first dc and fasten off.
Optional thumb edging
Work a round of dc evenly around the thumb hole in the same way, then join with a ss and fasten off. This also tidies the yarn ends left at the thumb gap.
Blocking
Lightly blocking crochet fingerless gloves helps the ribbing settle and evens out the seam. For wool, dampen the gloves, ease them into shape and leave them to dry flat. For acrylic, hold a steam iron above them without touching the yarn, then let them cool.
Variation: long crochet fingerless mitts (wrist warmers)
For crochet fingerless mitts that reach further up the arm, make the cuff section longer. Everything else stays the same, including the number of rows.
- Foundation: Ch 44 (46, 48).
- Row 1: Htr in 3rd ch from hook and in each ch to the end. Turn. (42 (44, 46) htr)
- Row 2: Ch 2, htr blo in each of the first 26 sts, htr in both loops in each of the remaining 16 (18, 20) sts. Turn.
- Row 3: Ch 2, htr in both loops in each of the first 16 (18, 20) sts, htr blo in each of the last 26 sts. Turn.
- Repeat Rows 2 and 3 until you have 21 (23, 25) rows, ending with a Row 3.
- Seam: ss through both layers in the first 28 (29, 29) sts, fasten off, skip 7 (8, 9) sts for the thumb, then join and ss through both layers in the remaining 7 (7, 8) sts.
Seam check: 28 + 7 + 7 = 42, 29 + 8 + 7 = 44 and 29 + 9 + 8 = 46. The longer cuff adds about 10cm. Allow about 75g to 100g of DK for the pair.
Forearms are wider than wrists, so try the rectangle on before seaming. If the top of the cuff feels tight, add 2 rows.
More ideas
- Stripes: change colour every 2 rows for vertical stripes that run along the glove.
- Contrast cuff: work the top and thumb edgings in a second colour.
- A matching set: pair your crochet fingerless gloves with our crochet hat and one of our crochet scarf patterns.

Caring for and gifting your gloves
Handmade crochet fingerless gloves last for years with a little care. Wash them according to the yarn label, gently squeeze out the water and dry them flat, never on a radiator. Reshape the ribbed cuff while the gloves are damp.
If you are giving this fingerless gloves crochet pattern as a present, it helps to know the recipient’s hand size. If you are not sure, size M fits a wide range of adult hands thanks to the stretchy cuff. Fold the pair together, tie them with ribbon and add a tag with the washing instructions.
Troubleshooting crochet fingerless gloves
- The glove is too big. Work fewer rows, or try a smaller hook. Rows control the width around the hand.
- The glove is too short or long. Change the foundation chain. Add or remove chains from the hand section only, and adjust the upper seam count to match.
- The thumb hole is too small. Skip 1 or 2 more stitches in the thumb gap and seam 1 or 2 fewer stitches below it.
- The cuff ribs are not showing. Make sure you are working into the back loop only in the cuff section on every row, not just alternate rows.
- The rectangle is getting wider at one end. Count stitches at the end of each row. The ch 2 at the start does not count, so do not work into it.
Frequently asked questions about crochet fingerless gloves
Are crochet fingerless gloves good for beginners?
Yes. This version is worked flat in rows of half treble, with no shaping or working in the round. The only extra skill is a slip stitch seam, which is very simple.
How much yarn do I need for crochet fingerless gloves?
For this pattern in DK, allow roughly 50g for a pair in size S, 50g to 60g for M and 60g to 70g for L. These are estimates, so buy a little extra, especially for the longer variation.
How do I make the gloves fit my hand?
Measure around your knuckles and choose the closest size. Before seaming, wrap the rectangle around your hand. Add or remove 2 rows at a time until it meets with a gentle stretch.
Can I use a thicker yarn?
Yes, but you will need to recalculate. Make a small swatch, measure the htr per cm, then chain enough for the length you want plus 2. Keep the cuff at about a third of the stitches and work rows until the width suits your hand.
What is the difference between fingerless gloves and fingerless mitts?
The names are often used for the same thing. Crochet fingerless mitts usually mean a simple tube with a thumb hole, like this pattern, while fingerless gloves sometimes have short separate fingers.