A crochet hat is one of the most satisfying things you can make with a single hook and a couple of balls of yarn. It is quick, it is useful from autumn right through to spring, and once you have made one you will want a pile of them in different colours.
This crochet hat pattern is a classic beanie worked from the top down in joined rounds, written in UK crochet terms (with UK and US terms side by side in the key) and exact stitch counts for every round. It comes in three sizes (child, adult S/M and adult L), and because it is worked top down you can try it on as you go and stop when the length is right.
If you are new to crochet, do not worry. The whole hat uses just a magic ring, half trebles and double crochet, so it makes a lovely first wearable project.
Why this crochet hat is great for beginners
Many people put off making a crochet hat because they think shaping will be tricky. This design keeps things simple. The crown is a flat circle that grows by the same number of stitches each round, so the pattern has an easy rhythm you will soon remember.
- Only three stitches: half treble (htr), double crochet (dc) and slip stitch (ss).
- Worked in the round: no seams to sew up at the end.
- Top down: you can try it on and adjust the length before you add the brim.
- Size friendly: each size simply stops increasing at a different round.
- Quick: in aran yarn most people can finish an adult hat over a couple of evenings.
If you have not tried half trebles yet, have a practice first with our half treble crochet guide. It shows exactly where to put your hook and how many loops to pull through.
Crochet hat styles: beanie vs slouchy vs bobble hat
Before you pick up your hook, it helps to know which style you are after. The names overlap a little, but these are the usual differences.
| Style | Fit | What makes it different |
|---|---|---|
| Crochet beanie | Close-fitting | Hugs the head, with the brim sitting just over the tops of the ears |
| Slouchy hat | Relaxed | Extra length in the body, so the top falls towards the back of the head |
| Bobble hat | Usually close-fitting | A beanie with a pompom (a bobble) on top |
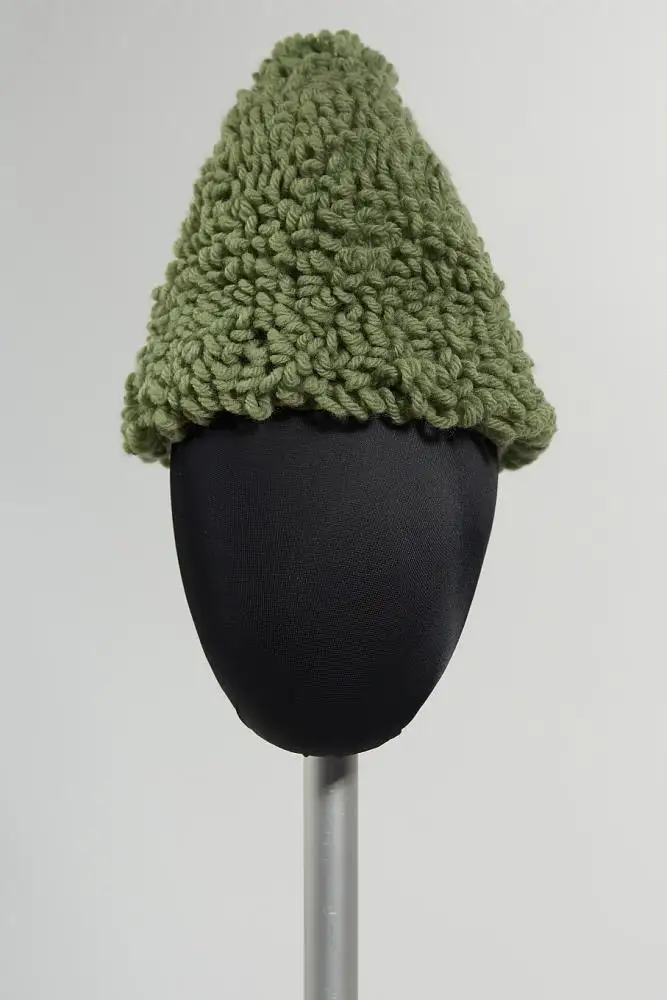
This pattern is a classic crochet beanie worked mostly in half treble crochet (htr; US half double crochet, hdc), with a brim in double crochet (dc; US single crochet, sc). To turn it into a slouchy hat, add a few extra even rounds before the brim. For a bobble hat, add the pompom described further down.
Bobble hat is the usual UK name, and in the US you may see the same thing called a pom-pom hat. Do not confuse it with bobble stitch, which is a raised, bumpy texture usually made from several unfinished treble crochet stitches (tr; US double crochet, dc) closed together. Our bobble stitch crochet guide shows how, and a row of bobbles makes a fun band on a plain crochet hat.
A note for Canadian readers: the toque
In Canada, a warm winter beanie is usually called a toque (sometimes spelled tuque). So if you are looking for a crochet toque pattern, this beanie is exactly that. Add a fold-up brim and a pompom for a traditional look.
What you need
You do not need anything special for this crochet beanie pattern. A basic kit and some soft yarn will do.
- Yarn: aran weight yarn. As a rough guide, around 100g is enough for an adult hat and a little less for a child size, but always check the length in metres on the ball band.
- Hook: 5mm crochet hook (US H-8), or whichever size gives you the tension below.
- Extras: a stitch marker, a yarn needle for weaving in ends, scissors and a soft tape measure.
- Optional: a pompom maker or two cardboard rings if you want a pompom on top.
Choosing yarn for a crochet hat
Aran is our favourite weight for a first crochet hat. It is thick enough to work up quickly, but not so bulky that the stitches are hard to see. Look for a soft yarn that does not itch on your forehead, and choose a mid or light colour so you can see each stitch clearly.
Wool and wool blends are warm and hold their shape well. Acrylic is easy to wash and comes in lots of colours. Cotton is less stretchy, so it can make a firmer hat that grips less.
You can also use DK yarn with a 4mm hook. DK gives a lighter, finer fabric, but you will have more stitches per 10cm, so a hat made with the same counts will come out smaller. If you use DK, make a tension swatch and you may need to follow the next size up. Our guide to crochet yarn explains fibres and weights in more detail, and the Craft Yarn Council yarn weight chart is handy for comparing UK and US weight names.
Tension and abbreviations
Tension: 14 htr and 10 rounds to 10cm in aran yarn with a 5mm hook. Tension matters for a hat because it decides the finished size. If you have more stitches per 10cm, try a bigger hook. If you have fewer, try a smaller hook.

This pattern uses UK terms. If you usually follow US patterns, see our UK vs US crochet terms page.
- ch chain
- ss slip stitch
- dc double crochet (US single crochet)
- htr half treble crochet (US half double crochet)
- st(s) stitch(es)
- 2 htr in next st one increase: work two half trebles into the same stitch
How to measure for a crochet hat
Getting the size right is the key to a crochet hat that stays on without feeling tight. Wrap a soft tape measure around the head, across the forehead just above the eyebrows and over the tops of the ears, at the widest part of the back of the head. Keep the tape snug but not pulled tight.

A beanie should be a little smaller than the head so that it hugs gently. This is called negative ease. For this hat we aim for roughly 2cm to 6cm less than the head measurement, depending on where in the size range you fall.
The crown diameter is the width of the flat circle at the top once you finish increasing. You can work it out by dividing the hat circumference by 3.14. For example, a hat circumference of 51cm gives a crown of about 16cm across.
Crochet hat sizes
Use the head measurement to pick your size. If you are between sizes, go up a size for a slouchier fit or down a size for a snugger fit.
| Size | Head circumference | Last increase round | Stitches | Crown diameter | Hat circumference | Total height |
|---|---|---|---|---|---|---|
| Child | 48 to 51cm | Round 7 | 63 | about 14cm | about 45cm | about 18cm |
| Adult S/M | 53 to 56cm | Round 8 | 72 | about 16.5cm | about 51.5cm | about 20cm |
| Adult L | 57 to 60cm | Round 9 | 81 | about 18.5cm | about 58cm | about 21cm |
Total height is measured from the centre of the crown down to the bottom edge of the brim, with the hat lying flat. Measurements are approximate and depend on your tension.
Crochet hat sizing chart: baby, child and adult
These are standard approximate head sizes. Heads vary a lot, so measuring is always best, but the chart is useful when you are making a gift. To find the hat size, take off about 2cm to 6cm for negative ease.
| Age or size | Head circumference (cm) | Head circumference (inches) |
|---|---|---|
| Newborn | 33 to 36cm | 13 to 14in |
| Baby 3 to 6 months | 36 to 43cm | 14 to 17in |
| Baby 6 to 12 months | 41 to 48cm | 16 to 19in |
| Toddler | 46 to 51cm | 18 to 20in |
| Child | 48 to 53cm | 19 to 21in |
| Teen and adult small | 53 to 56cm | 21 to 22in |
| Adult medium | 56 to 58cm | 22 to 23in |
| Adult large | 58 to 61cm | 23 to 24in |
For baby sizes, please use our dedicated crochet baby hat pattern, which has no pompom or ties.
How to adjust the crown of your crochet hat
Because each crown round adds 9 stitches, you can change the size by stopping the increases at a different round. Here is how to work it out at the tension in this pattern (14 htr to 10cm, so 1.4 stitches per cm).
- Measure the head and take off 2cm to 6cm to get the hat circumference you want.
- Multiply that number by 1.4 to find how many stitches you need.
- Stop increasing at the crown round whose count is closest: 54, 63, 72 or 81 stitches.
- Check the crown: its width should be about the hat circumference divided by 3.14.
- Work even rounds until the hat is long enough, then add the brim.
For example, a 55cm head with 4cm of negative ease needs a 51cm hat. 51 x 1.4 is about 71 stitches, so you would stop at 72, which is the adult S/M size.
Crochet hat pattern: the crown
Every round is joined with a slip stitch. The ch 2 at the start of each round does not count as a stitch, so always work your first htr into the same stitch as the join. Place a stitch marker in the first htr of each round so the join is easy to find.
Start with a magic ring. If you have not made one before, our magic ring tutorial walks you through it step by step.
- Round 1: Make a magic ring, ch 2, work 9 htr into the ring, pull the tail to close the ring, ss into the first htr. (9 sts)
- Round 2: Ch 2, 2 htr in each st around, ss into the first htr. (18 sts)
- Round 3: Ch 2, [2 htr in next st, htr in next st] 9 times, ss into the first htr. (27 sts)
- Round 4: Ch 2, [2 htr in next st, htr in next 2 sts] 9 times, ss into the first htr. (36 sts)
- Round 5: Ch 2, [2 htr in next st, htr in next 3 sts] 9 times, ss into the first htr. (45 sts)
- Round 6: Ch 2, [2 htr in next st, htr in next 4 sts] 9 times, ss into the first htr. (54 sts)
- Round 7: Ch 2, [2 htr in next st, htr in next 5 sts] 9 times, ss into the first htr. (63 sts) Child size stops increasing here.
- Round 8 (adult sizes only): Ch 2, [2 htr in next st, htr in next 6 sts] 9 times, ss into the first htr. (72 sts) Adult S/M stops increasing here.
- Round 9 (adult L only): Ch 2, [2 htr in next st, htr in next 7 sts] 9 times, ss into the first htr. (81 sts)
Each repeat adds exactly one stitch, and there are nine repeats in every round, so each round grows by 9 stitches. Count your stitches at the end of every round. It is much easier to fix a missed increase now than later.
Lay the crown flat and measure across the middle. It should be close to the crown diameter in the size table. If it is ruffling, your tension may be loose; if it is cupping like a bowl, your tension may be tight.
Crochet hat pattern: the body
Now the hat stops growing and you work straight down to make the sides. Every body round has the same number of stitches as your last increase round.
- Even rounds: Ch 2, htr in each st around, ss into the first htr. (63, 72 or 81 sts)
Repeat this even round until the hat measures the right length from the centre of the crown, leaving room for the brim:
- Child: work even rounds 8 to 15 (8 rounds), until the hat measures about 15cm.
- Adult S/M: work even rounds 9 to 17 (9 rounds), until the hat measures about 17cm.
- Adult L: work even rounds 10 to 18 (9 rounds), until the hat measures about 18cm.
At this point, try the hat on (or on the person it is for). Because the brim adds around 3cm, it should sit just above the ears. Add or remove an even round if needed.

The brim: a simple dc band
The brim is worked in double crochet, which is shorter and firmer than htr. It gives a neat, slightly snug edge that helps the crochet hat stay in place.
- Brim rounds: Ch 1 (does not count as a st), dc in each st around, ss into the first dc. (63, 72 or 81 sts)
Work this brim round 4 times in total. That is rounds 16 to 19 for the child size, rounds 18 to 21 for adult S/M and rounds 19 to 22 for adult L. Fasten off, leaving a 15cm tail, and weave in all ends securely.
Optional raised rib brim
If you prefer a ribbed look, you can work the brim with raised stitches instead. Raised rib alternates one stitch worked around the front of the post with one worked around the back, so it needs an even number of stitches.
- Adult S/M already has 72 sts, which is even, so no change is needed.
- Child and adult L: in your last even body round, work 2 htr together once instead of 2 single htr. This leaves 62 sts (child) or 80 sts (adult L).
Then work 4 rounds of: ch 2 (does not count as a st), [htr around the front post of the next st, htr around the back post of the next st] around, ss into the first st. Always work the front post stitch around a front post stitch and the back post stitch around a back post stitch, so the ribs line up.
Adding a pompom
A pompom is optional, but it is a fun finishing touch on an adult or older child’s crochet hat. You can make one with a plastic pompom maker or with two cardboard rings.
- Wind yarn evenly around the pompom maker or rings until it is nicely full.
- Cut around the outer edge with sharp scissors.
- Tie a long, strong piece of yarn very tightly around the middle and knot it several times.
- Fluff it up and trim any uneven strands into a neat ball.
- Thread the long ties through the centre of the crown, knot them firmly on the inside and weave in the ends.
A pompom around 6cm to 8cm across suits most adult sizes. Pompoms are not suitable for babies or young children, so for little ones see our crochet baby hat pattern instead, which is designed without any extras.
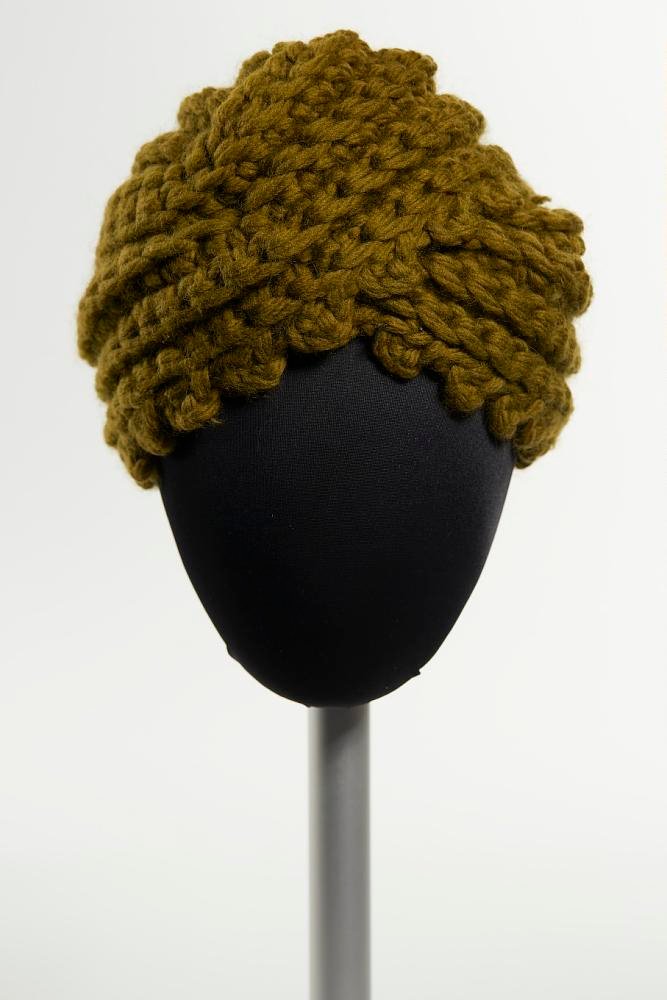
Ways to change your crochet hat
Once you know the basic shape, this crochet beanie pattern is easy to play with. Here are a few simple ideas that do not change the stitch counts:
- Stripes: change colour at the start of a round, joining the new colour with the slip stitch that closes the round before.
- Slouchy fit: add 3 to 5 extra even rounds before the brim so the top relaxes towards the back of the head.
- Fold-up brim: work 8 brim rounds instead of 4 and fold the band upwards.
- Back loop texture: work the even body rounds in the back loop only of each htr for a subtle ridged look.
A matching scarf makes a lovely set. Our crochet scarf pattern uses the same kind of yarn, so you can make both from the same colours.
Common crochet hat problems and fixes
Most issues with a crochet hat come down to tension or a miscounted round. Here is what to look for.
| Problem | Likely cause | What to try |
|---|---|---|
| Crown is wavy | Loose tension or extra increases | Count each round, or try a smaller hook |
| Crown curls into a bowl too early | Tight tension or missed increases | Check counts, or try a larger hook |
| Hat is too big | Loose tension | Remake with a smaller hook or the next size down |
| Hat is too short | Not enough even rounds | Add even rounds before the brim |
| Visible seam line | Join drifting each round | Use a stitch marker and always start in the join stitch |
A visible line of joins is normal in joined rounds. Keeping it at the back of the head makes it almost invisible when worn.
Caring for your crochet hat
Look at the ball band before you wash anything. Many acrylics and superwash wools can go in the washing machine on a gentle, cool cycle, while pure wool usually needs a hand wash in cool water to avoid felting.
- Remove or protect a pompom before machine washing, or hand wash the hat instead.
- Squeeze out water gently. Do not wring or twist the fabric.
- Roll the hat in a towel to soak up extra water.
- Dry flat, shaping it over a bowl or a balloon to keep the crown round.
- Keep it away from direct heat such as radiators.
Store your crochet hats folded rather than on hooks, as hanging can stretch the brim over time.
Frequently asked questions about crochet hat
How much yarn do I need for a crochet hat?
As a rough guide, around 100g of aran yarn is enough for an adult crochet hat in this pattern, and a little less for the child size. Always check the metres on your ball band, and allow a little extra if you are adding a pompom.
Can I make this crochet hat pattern with DK yarn?
Yes, with a 4mm hook, but DK has more stitches per 10cm, so the same counts give a smaller hat. Make a tension swatch first, and you may need to follow the next size up.
Why does my crochet hat crown ruffle or cup?
Usually it is tension or a counting slip. A wavy crown often means loose stitches or extra increases, while a crown that curls too soon means tight stitches or missed increases. Count every round and change your hook size if needed.
How do I know which size crochet hat to make?
Measure around the head just above the eyebrows and ears, then use the size table. The finished hat is a little smaller than the head so that it hugs gently and stays on.
Is this crochet beanie pattern suitable for babies?
The smallest size here is for a child. For babies we have a separate pattern with smaller sizes, softer yarn and no pompom, plus important safety notes.
What is a crochet toque?
Toque (or tuque) is the Canadian word for a warm, close-fitting winter beanie. Any crochet beanie pattern, including this one, can be made as a toque. A fold-up brim and a pompom give it a classic look.
What is the difference between a crochet beanie and a slouchy hat?
A beanie fits closely to the head, while a slouchy hat has extra length in the body so the top falls loosely towards the back. You can turn this crochet hat into a slouchy style by adding a few even rounds before the brim.