A crochet temperature blanket is a year-long project where you crochet one row, or one square, each day in a colour that matches that day’s temperature. By 31 December you have a cosy, colourful record of the whole year. If you start on 1 January 2027, now is the perfect time to plan it.
At a glance: A crochet temperature blanket is a year-long project where you crochet one row, or one square, each day in a colour that matches that day's temperature. Yarn and hook: DK yarn and a 4.00mm (UK 8) hook (US G-6). Time: 10 to 20 minutes a day for a year. Terms: UK, with US conversions.
Every step is covered below: choosing a method, building a colour chart in Celsius and Fahrenheit, finding reliable daily temperatures, working out yarn amounts and blanket size, catching up when life gets busy, and finishing with a border. Stitches are given in UK and US terms, so readers in the UK, US, Canada, Australia and New Zealand can all follow along.
What is a crochet temperature blanket?
A crochet temperature blanket turns weather data into colour. You choose a set of colours, give each one a temperature range, and then crochet a small piece each day using the colour for that day’s reading. Cold days might be deep blues and purples, mild days greens and yellows, and hot days oranges and reds.
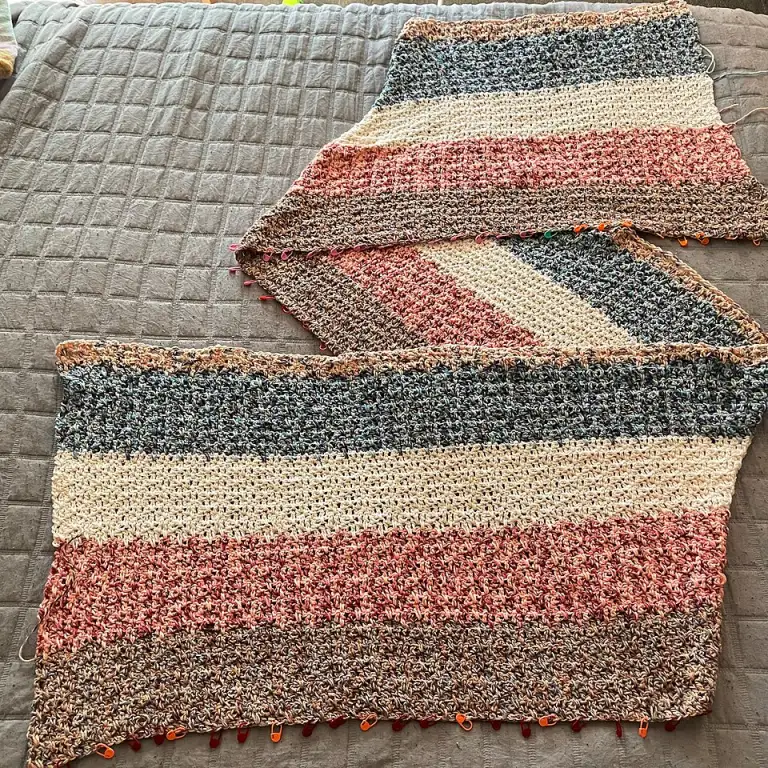
The finished crochet temperature blanket shows the seasons as gradual bands of colour, with surprise warm spells and cold snaps standing out clearly. No two are ever the same, because every place and every year has its own weather.
It is also a gentle habit. Ten to twenty minutes a day is usually enough, and the project grows quietly in the background. That makes a temperature blanket crochet project a lovely New Year goal that does not feel overwhelming.
UK and US crochet terms used in this guide
We write in UK terms first. The same names mean different stitches in the US, so check this table before you start. Our UK vs US crochet terms guide explains the differences in more detail.
| UK term | UK abbreviation | US term | US abbreviation |
|---|---|---|---|
| Chain | ch | Chain | ch |
| Slip stitch | ss | Slip stitch | sl st |
| Double crochet | dc | Single crochet | sc |
| Half treble crochet | htr | Half double crochet | hdc |
| Treble crochet | tr | Double crochet | dc |
| Double treble crochet | dtr | Treble crochet | tr |
Choosing a method for your crochet temperature blanket
The first big decision is how each day will appear in the blanket. There is no right answer. Pick the method that suits your time, your stitch confidence and the size you want.

Method 1: one row per day in moss stitch
Moss stitch (also called linen stitch or granite stitch) is a favourite for a row-a-day crochet temperature blanket. It alternates double crochet (dc; US single crochet, sc) and chain spaces, and you work each dc into the chain-1 space of the row below. The result is a flat, woven-looking fabric where colours sit neatly side by side.
Moss stitch rows are short, which keeps the finished length more manageable. It also uses a little less yarn than taller stitches. Our moss stitch crochet blanket pattern shows the stitch step by step.

Method 2: one row per day in half treble
Half treble crochet (htr; US half double crochet, hdc) is quick and makes a soft, slightly thicker fabric. Each row is taller than a moss stitch row, so your blanket grows faster, both in length and in yarn use. If you are new to the stitch, our half treble crochet guide covers it from the first loop.
Many makers like htr because it is easy to count and easy to fix. If you find 365 rows of htr too long, see the size options further down.
Method 3: one granny square per day
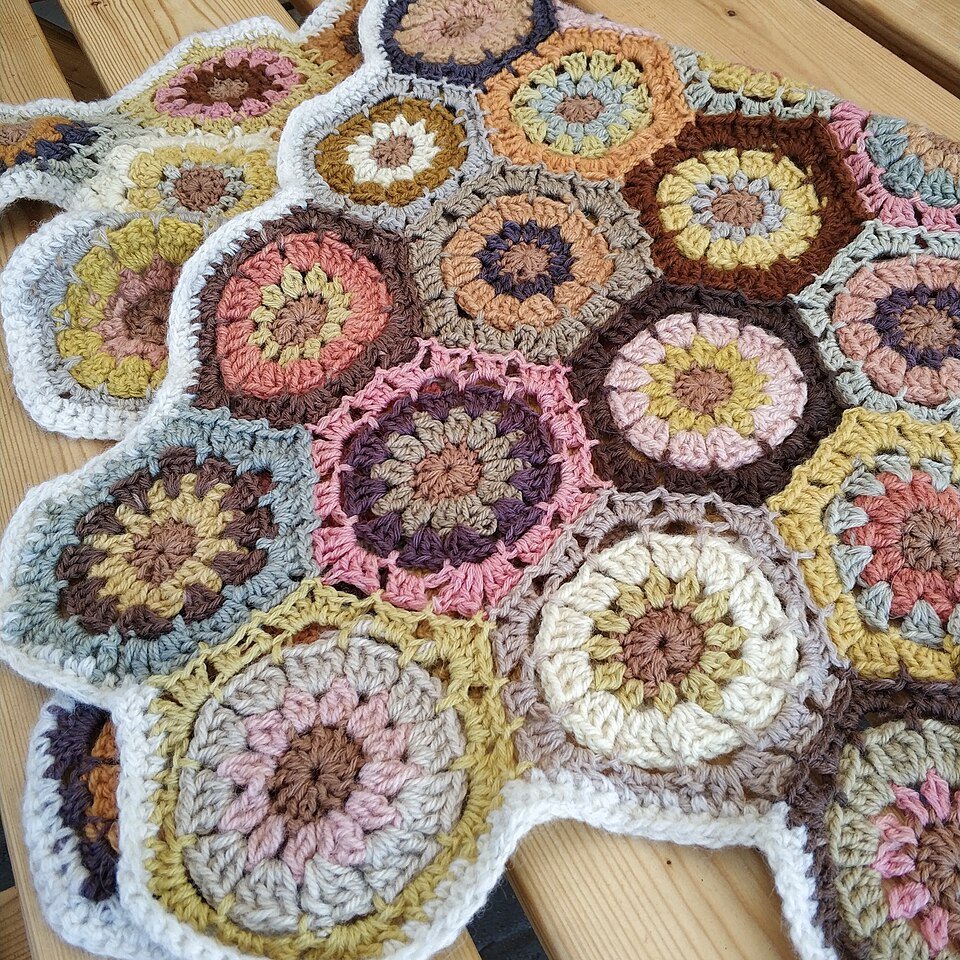
Instead of rows, you make one small square each day. A simple granny square uses clusters of three treble crochet (tr; US double crochet, dc) separated by chain spaces. You can work the whole square in the day’s colour, or use the centre for the high temperature and the outer round for the low.
A square-a-day crochet temperature blanket is portable, so it suits busy people and travel. The downside is that you have 365 squares to join and lots of ends to weave in. A neat layout is 14 squares wide (two weeks per row) and 26 rows tall, which holds 364 squares, plus one extra square for 31 December worked into the border or sewn as a label.
Method 4: corner to corner (C2C)
Corner to corner crochet is built from little blocks, each made with chains and three treble crochet (tr; US double crochet, dc), worked diagonally. Because each diagonal row changes length, C2C does not suit one row per day for a full year. It works well for a weekly version instead.
A square of 27 by 27 blocks has 53 diagonal rows. That is one diagonal per week for 52 weeks, plus one extra to finish. Our corner to corner crochet blanket guide explains how the blocks fit together.
How to make a crochet temperature blanket colour chart
Your colour chart is the heart of a crochet temperature blanket. It tells you which yarn to pick up each day, so it needs to be clear, cover every possible temperature and stay the same all year.
Most makers use between 8 and 14 colours. Ten is a good balance: enough to show the seasons, but not so many that small differences get lost. Choose colours that move in a clear order, such as cool to warm, so the finished crochet temperature blanket reads like a gradient.
Example 10-band crochet temperature blanket chart for a UK climate
This example crochet temperature blanket chart uses the daily high temperature and suits most of the UK, where winter highs rarely stay far below freezing and summer highs above 30°C are unusual. Round each reading to the nearest whole degree first, then find its band. Fahrenheit figures are rounded.
| Band | Celsius | Fahrenheit (approx.) | Colour idea |
|---|---|---|---|
| 1 | Below 0°C | Below 32°F | Navy |
| 2 | 0 to 3°C | 32 to 37°F | Royal blue |
| 3 | 4 to 6°C | 39 to 43°F | Sky blue |
| 4 | 7 to 9°C | 45 to 48°F | Teal |
| 5 | 10 to 12°C | 50 to 54°F | Sage green |
| 6 | 13 to 15°C | 55 to 59°F | Lime green |
| 7 | 16 to 18°C | 61 to 64°F | Pale yellow |
| 8 | 19 to 21°C | 66 to 70°F | Mustard |
| 9 | 22 to 25°C | 72 to 77°F | Orange |
| 10 | 26°C and above | 79°F and above | Red |
Write your chart on a card, tie a short sample of each yarn next to its band, and keep it with your project bag. It saves a lot of second guessing on dark winter evenings.
Adjusting the chart for the US, Canada, Australia and New Zealand
Every climate is different, so treat the UK chart as a starting point. The simplest way to set your own bands is to look up last year’s lowest and highest daily temperatures for your area, then divide that range into roughly equal steps.
- Canada and the northern US: winters are much colder, so add more bands below freezing, for example down to -20°C (-4°F) and below.
- The southern US: you may need fewer cold bands and more warm ones, with the top band starting around 35°C (95°F).
- Australia: extend the top of the chart, with bands up to 40°C (104°F) and above in hotter regions.
- New Zealand: ranges are often closer to the UK, but check your own region, as inland and alpine areas can be much colder.
Readers in the Southern Hemisphere should remember that January is summer. Your crochet temperature blanket will start warm, cool through the middle of the year and warm up again at the end, which looks just as striking.
Finding daily temperatures for your crochet temperature blanket
For a crochet temperature blanket, consistency matters more than precision. Pick one source and one location, and use them every day of the year. Mixing a phone app one day with a garden thermometer the next can give odd jumps in colour.
In the UK, the Met Office publishes observations from weather stations around the country, and its website is a reliable place to check yesterday’s high and low. Elsewhere, look for your national weather service: the National Weather Service in the US, Environment and Climate Change Canada, the Bureau of Meteorology in Australia, or MetService in New Zealand.
Many makers crochet the previous day’s row each morning, once the final figures are known. Keep a simple log in a notebook or spreadsheet with the date, the temperature and the colour band. If you miss a few days, the log makes catching up easy.
Daily high or average temperature?
There are three common choices, and each gives a slightly different look.
- Daily high: the simplest option and the one used in our chart. It is easy to find and shows warm spells clearly.
- Daily average: add the high and low together and divide by two. This gives a softer, more muted spread of colours.
- High and low: work two rows per day, or half a row in each, using one colour for the high and one for the low. This doubles the length, so it suits moss stitch or a narrower blanket.
Whichever you choose, decide before 1 January and stick with it.
How much yarn does a crochet temperature blanket need?
Yarn amounts for a crochet temperature blanket depend on your stitch, hook, tension and width, so a test row is far more reliable than any general estimate. It only takes a few minutes and saves buying too much or running short in August.
- Chain the full width of your blanket in any spare yarn of the same weight you plan to use.
- Work two or three rows in your chosen stitch, then weigh one row’s worth on kitchen scales. If your scales are not precise, weigh ten rows and divide by ten.
- Multiply the weight of one row by 365 (or by the number of rows you plan) to find the total for the body of the blanket.
- Add around 10 to 15 per cent for ends, mistakes and the border.
For example, if one row weighs 4g, 365 rows need about 1,460g, plus extra for the border. That is a rough guide only, as your own row weight will differ.
The tricky part is that colours are not used evenly. In a UK chart, the middle bands are used far more than the coldest and hottest. Buy one or two balls of the extreme colours and more of the middle ones, then top up as the year goes on. Buying from a long-running yarn range makes topping up easier. Our crochet yarn guide explains weights and fibres if you are choosing for the first time.

Blanket size maths: how big will it be?
One row per day sounds small, but 365 rows add up. A crochet temperature blanket worked in rows is almost always longer than it is wide, and it can become very long indeed with taller stitches.
To estimate the finished length, measure the height of 10 rows on your test swatch and multiply by 36.5. If 10 rows of your stitch measure 6cm, 365 rows will be about 219cm long. Taller stitches such as half treble crochet (htr; US half double crochet, hdc) will be longer again.
If that is longer than you want, try one of these options:
- Two rows per week: use the weekly highest and lowest, giving 104 rows. Great for a lap blanket.
- A half-row per day: work half the width in one day’s colour and the other half in the next day’s colour. That gives about 183 rows.
- A shorter stitch: moss stitch or plain double crochet (dc; US single crochet, sc) rows are shorter than htr.
- A finer yarn: 4-ply instead of DK makes each row thinner, though it takes longer to work.
- Squares or C2C: these naturally give a squarer shape.
For width, most row-a-day blankets are 90cm to 130cm wide. Narrower is quicker each day, but makes the blanket even longer in proportion.
Getting started on 1 January 2027
A little preparation in December makes the first weeks of your crochet temperature blanket feel easy. Before the new year, try to have these ready:
- Your chosen method, stitch and colour chart, written down.
- At least one ball of every colour, so any day can be worked.
- Your foundation chain, or a first row in a neutral colour, already made.
- A weather source and a log for recording each day.
- A project bag, scissors, a tapestry needle and stitch markers.
Many makers place a stitch marker at the start of each month. It makes counting rows easy and helps you check you have not missed a day. Some also add a contrasting row or a small marker stitch for birthdays and special dates.
How to catch up if you fall behind
Almost everyone falls behind at some point, and that is completely fine. Your crochet temperature blanket is a record of the weather, not a test of willpower. Because the temperatures are written down, you can always catch up later.
- Keep logging: even if you cannot crochet, write down each day’s temperature so nothing is lost. Most national weather services also keep past records.
- Batch by colour: if you are working squares, make all the missing squares of one colour together.
- Set a weekly catch-up slot: some makers crochet a whole week of rows every Sunday rather than one a day.
- Check your count: before you start again, count the rows since the last monthly marker so the dates stay correct.
If you are far behind, consider switching to the two-rows-per-week option from that point on. It is your blanket, and a finished project matters more than a perfect plan.
Adding a border to your crochet temperature blanket
A border tidies the edges of a crochet temperature blanket, hides small tension changes and frames the colours. It is worked once the year is complete, usually in January of the following year.
A simple choice is two or three rounds of double crochet (dc; US single crochet, sc) all the way round, working 3 dc into each corner to keep it flat. A neutral colour such as cream, grey or navy lets the bands stand out. You could also use the coldest and hottest colours from your chart.
Some makers add a final round showing the year, or a small label with the location and chart. For more ideas, from plain edges to shells, see our crochet blanket border guide.
Temperature blanket variations to try
The crochet temperature blanket idea works with other daily data too. If a full temperature blanket crochet project does not appeal, try one of these.
- Sky blanket: crochet one row in the colour of the sky each day, from grey and white to bright blue and pink sunsets.
- Mood blanket: give each colour a feeling and crochet a row for how your day went. Keep the chart kind and simple.
- Rainfall or sunshine: use a light colour for dry days and darker colours for heavier rain.
- Granny stripes: work the year in granny clusters, similar to our cosy granny stripe blanket, with one stripe per day or per week.
- Baby’s first year: start on a birth date instead of 1 January for a meaningful keepsake.
If you would like a quicker first project before committing to a year, our easy crochet blanket pattern is a good place to build confidence. You can also read more about the history of the craft on Wikipedia’s crochet page.
Tips for a crochet temperature blanket you will love
- Swatch your colours together: crochet a short stripe of all ten before you buy in bulk, to check they flow well.
- Use one yarn range: mixing brands can change thickness and make the edges wobble.
- Count stitches often: check your stitch count every week so the sides stay straight.
- Weave in ends as you go: or crochet over them. 365 days of ends is a lot to leave until December.
- Enjoy the process: the slow growth of a crochet temperature blanket is part of the charm.
Frequently asked questions about crochet temperature blankets
When should I start a crochet temperature blanket?
Most people start on 1 January, so the blanket covers one calendar year, such as 2027. You can start on any date, though, such as a birthday, an anniversary or the first day of a new season.
What is the best stitch for a temperature blanket?
Moss stitch and half treble crochet (htr; US half double crochet, hdc) are both popular for one row per day. Moss stitch gives shorter rows and a flatter fabric. Granny squares and corner to corner blocks suit makers who prefer smaller pieces.
How many colours do I need for a crochet temperature blanket?
Between 8 and 14 colours is common. Ten colour bands is a good balance for most climates, with each band covering about three degrees Celsius (around five degrees Fahrenheit).
How long is a crochet temperature blanket with one row a day?
It depends on your stitch and yarn. Measure 10 rows of your swatch and multiply by 36.5. Many row-a-day blankets end up around two metres long or more, which is why some makers use two rows per week or a half-row per day.
Should I use the high or the average temperature?
The daily high is simplest and easy to find. The daily average (high plus low, divided by two) gives a softer look. Choose one before you start and use it all year so the colours stay consistent.